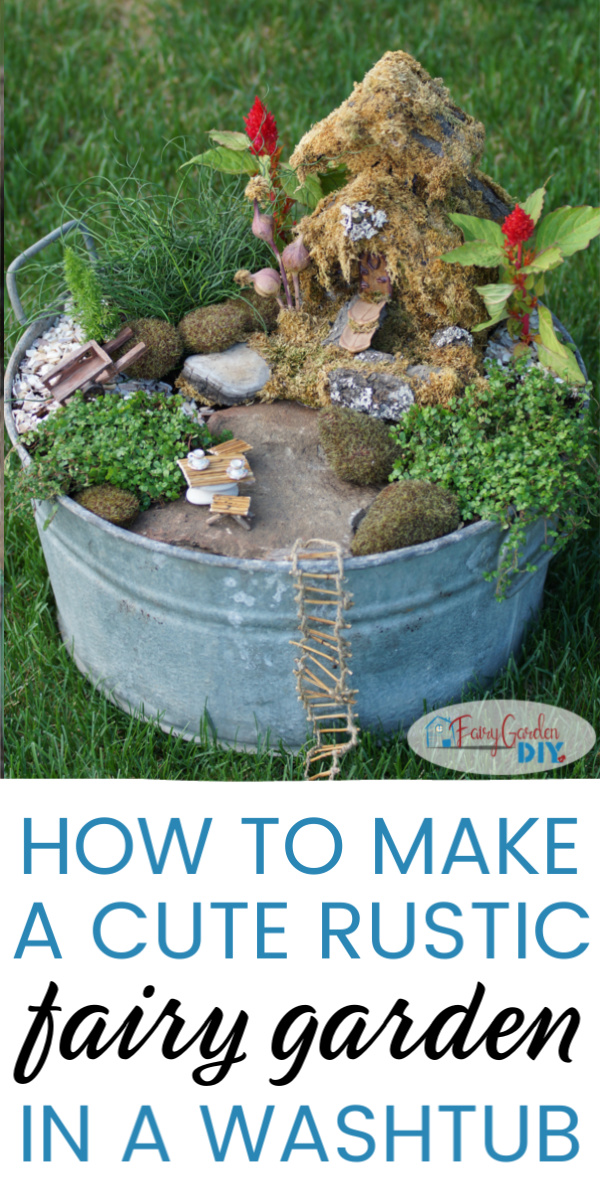
How to make a washtub fairy garden
 This absolutely adorable washtub fairy garden is one of the first fairy gardens my kids and I put together.
Check out our 10 FAVOURITE PLACES for finding the CHEAPEST fairy garden supplies!
I followed the general rules of how to make a fairy garden, keeping the dwelling to just one – because of the small square footage of the garden. (Don’t worry, if you have much smaller houses, or desperately want to add more than one your washtub fairy garden, well, rules are made to be broken!)
I didn’t think to take pictures of the process, but honestly, this little fairy garden was SO easy to create, I think anyone could do it with very basic instructions.
(THIS POST MAY CONTAIN AFFILIATE LINKS. YOU CAN READ OUR FULL DISCLOSURE POLICY HERE.)
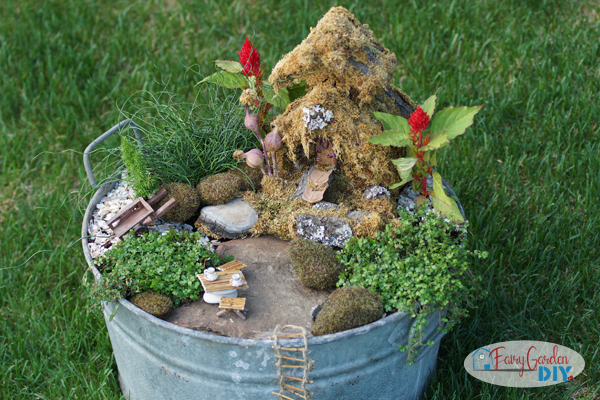
You can buy nice-looking but cheap galvanized washtubs on Amazon, however I got this one out of an old house near my place that was being demolished. (I was in HEAVEN just wandering around it picking cool stuff up – I got an amazing birdcage too!)
This old washtub is in really great condition, and I’d been using it as a planter for a couple of years, and feeling bad that I was essentially destroying it. (Having all that wet dirt in it year-round is really hard the metal, rusting out the bottom!
Now that it’s just a home for fairies, it will fare far better. These little plants just need a bit of water – the soil doesn’t have to be nearly as wet as often for these as it did for giant wave petunias.
If you’re only going to use small plants in your washtub fairy garden, like I have, you can reduce the dirt in your washtub (so it’s less heavy to move around – you might want to be able to bring it inside for the winter or move it under shelter if it hails etc.
A great way to “take up space” inside your washtub before you fill it with dirt is to turn a plastic flower pot upside-down inside it before filling with dirt. You could also just place 3-4 2L pop-bottles or a couple rinsed out milk jugs in the tub.
I filled my tub with dirt – up to about 1/2 inch below the rim, and placed a large flat rock into the dirt.
This would be my “patio” – I always imagine the fairies don’t want to wander around in the dirt.
Next, I placed my house.
I far prefer to make a fairy house myself, but this one I purchased at a local nursery when picking up some plants for my succulent fairy garden. It’s hand-made by a local here, and it looks like it would have been time intensive but easy enough to make!
It’s entirely made from natural materials, bark, moss, and some cool tree funguses – I was absolutely ENCHANTED by it! (And I do plan to make some of these myself ASAP.)
To keep the bottom from rotting (from sitting on damp soil) I covered the bottom with plastic wrap before placing it in the dirt.
Choosing plants for my miniature washtub garden
![]()
When I create fairy gardens with tall houses in containers where there is nothing behind the dwelling, I like to put taller plants near the houses – otherwise, the house sort of sticks out awkwardly and feels unprotected. (I don’t know about your fairies, but mine like cozy. Wide-open spaces are not their jam, I’m sure.)
I also like to include plants low to the ground, for cover.
For this washtub fairy garden, I chose creeping thyme, corkscrew rush, foxtail fern, and (fuzzy red plant name).
I loved the pop of color from the (fuzzy red plant name) and corkscrew rush plant is one of my favorites for fairy gardens because it’s SO whimsical.
I also added a foxtail fern next to the corkscrew rush, which will get taller in time. They look kinda like miniature pine trees, don’t they?
The last plants to go into this washtub fairy garden were 2 creeping thyme plants (one on each side of the rock “patio”).
Creeping thyme is such a great ground cover for fairy gardens! (If you’re struggling with choosing plants, here’s a great guide on the best plants for fairy gardens.!)
Where the dirt was extremely obvious around the foxtail fern on the left, and around the right side of the house, we sprinkled crushed seashells on top and lightly packed them down. (As I said, I prefer when my fairies don’t have to get their feet too dirty!)
We filled in any glaring empty spaces with faux moss stones (a package of these is your secret weapon to making a fairy garden look finished).
Finally, we chose a couple of cute accessories for our washtub fairy garden, including a rope ladder (to get in and out of the washtub, I’m not certain all fairies can fly…), a wheelbarrow for them to… I dunno, perhaps move their moss stones around, and a reed table and stools (which we made) with a tea set.
The tea set is cute little charms I got at Micheals (and removed the jump rings from), but Amazon has REALLY cute tea set options for less than ten bucks, and this one comes with a teapot! (Mine did not.)
If you make a fairy garden in a washtub, PLEASE post a picture in the comments – I would LOVE to see it!
Dang you had such great ideas in your post I saved them all.
lol, well, YAY!