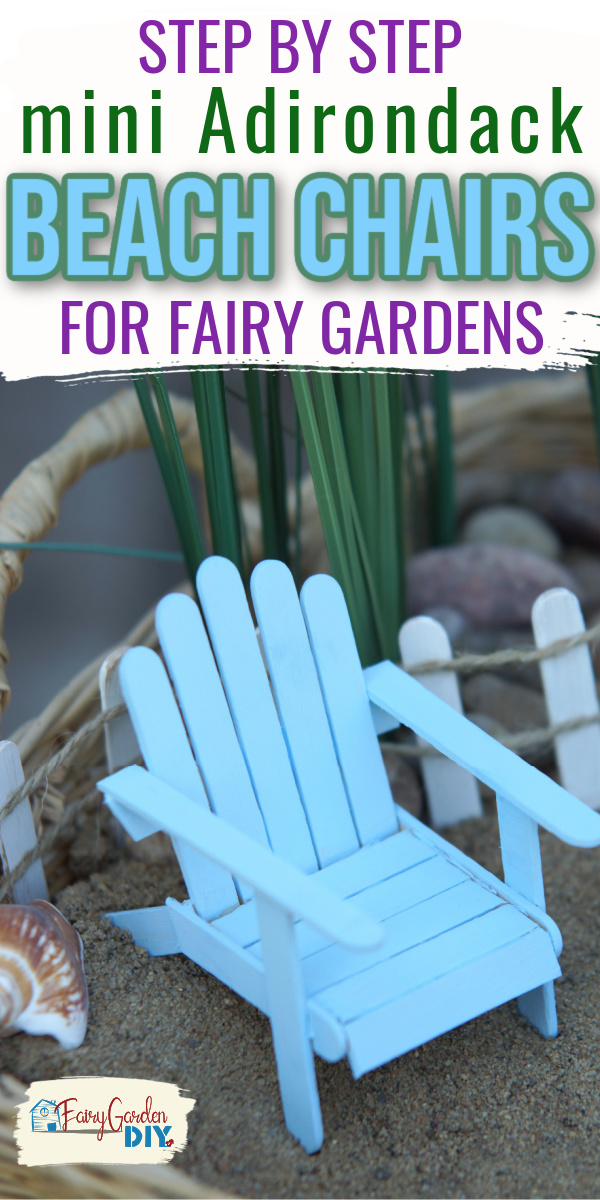
How to make a fairy garden beach chair with popsicle sticks
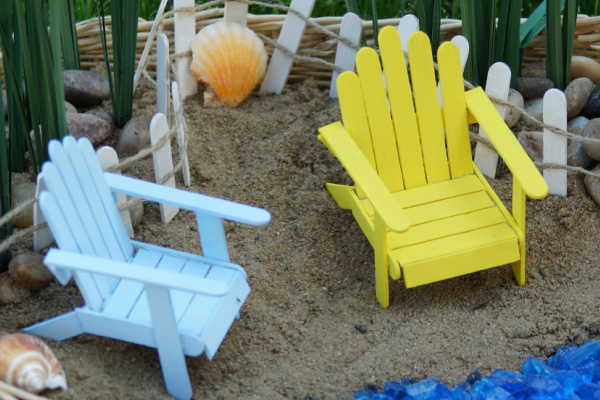
These adorable mini Adirondack beach chairs for fairy gardens are SO easy to make, and they really are the highlight of any beach themed fairy garden, in my opinion. Probably my absolute favorite of all the beach fairy garden accessories!
Check out our 10 FAVOURITE PLACES for finding the CHEAPEST fairy garden supplies!
I’ll show you how I made these ones, step by step!
You could probably figure it out yourself – but I made one prior to these that just WASN’T as cute, so I won’t let you waste that time too.
Popsicle sticks are SUCH a great medium for building fairy garden accessories – you can get them at the dollar store (so they are super cheap) and they cut easily with heavy-duty scissors or wire cutters. They work great in indoor fairy gardens OR outdoor fairy gardens!
You can paint them any color and stick them together with wood glue or plain old hot glue… and if you’re not happy with your project (like my first diy fairy garden beach chair, lol) you can throw it out and start again because it really only cost you a few cents.
(THIS POST MAY CONTAIN AFFILIATE LINKS. YOU CAN READ OUR FULL DISCLOSURE POLICY HERE.)
What you’ll need to make a popsicle stick fairy garden beach chair:
- Popsicle sticks
- hot glue or wood glue
- pen (for marking where to cut)
- wire cutters or heavy scissors
- paint + paintbrush (optional)
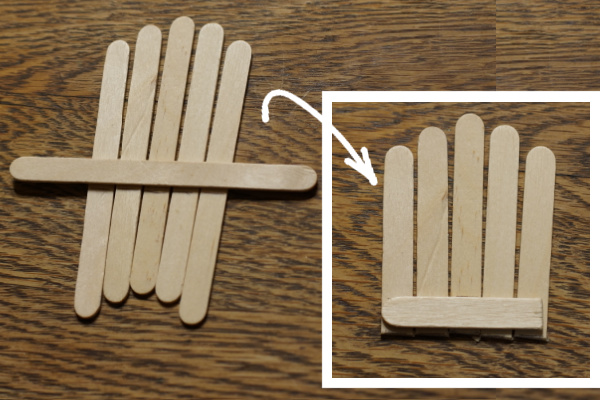
1) Layout the back of the chair
Consider fanning out the popsicle sticks just a bit – the first chair I made, I stuck them all together and it didn’t have the same “real” look when it was done.
Stager the length of the sticks on the sides so the back of your chair gets that curved top.
Mark the sticks where you need to trim them, I made mine just longer than half.
Glue the chair together by fixing one half a popsicle stick across the bottom of all the sticks at the back.
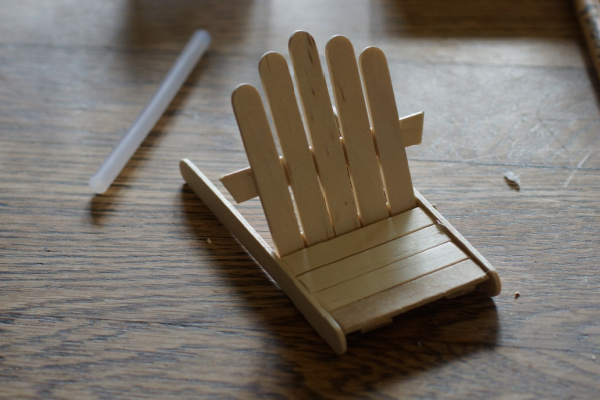
2) Halfway up the back of the chair back, add another “bar”
This will support your chair arms so you want it to stick past the edges just a finger’s width or so!
Glue it in place and trim on an angle.
![]()
3) Measure your seat slats and mark them
You want your seat to be as wide as the bottom of the chair back, so I used the chair back as a guide to mark my seat slats where they needed to be trimmed.
Trim both ends of the popsicle stick- you don’t want the rounded edges of the stick.
![]()
4) Glue the seat together with 2 offcuts of popsicle stick on the bottom side
I left small gaps between my seat slats… I felt this looked more realistic!
![]()
5) Glue full-length popsicle sticks along the edge of your seat
You want to keep the top of the seat parallel with the edge of the popsicle stick.
![]()
![]()
6) Glue the chair back to the back edge of the seat
Glue the chair back at the back edge of the seat, between the long popsicle sticks, at a slight angle. (Adirondack chairs rarely have a 90-degree angle between the seat and the back! they lean back a bit.)
7) Glue the “front legs” on the chair
You’ll want these legs to be the same length, so measure and mark them to ensure that your sticks are glued in the right place.
I glued my front legs on at a slight angle from the chair seat.
Then I trimmed the top of the legs (where the arm rests will sit) at an angle that was (more or less) parallel to the ground.
![]()
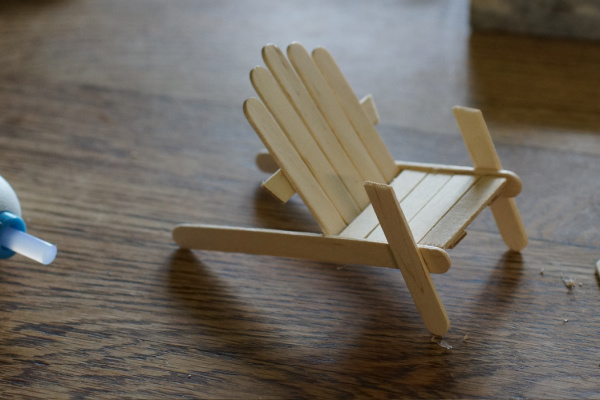
(It’s really starting to look like a fairy garden beach chair at this point!)
8) Glue the armrests on
You can glue whole popsicle sticks on for the armrests and trim after the glue is dry – I found that easier than trying to measure and make fit.
Some diy fairy garden beach chair tutorials suggest leaving these long popsicle sticks just like this and calling this complete… but I didn’t love the way it looked, and decided to trim both the long back legs AND the weird long arm rests.
![]()
9) Trim back legs and armrests
![]()
10) Cut and attach back legs to chair
I used the offcuts from the long armrests – they were the perfect size for my back legs!
I also attached these at an angle.
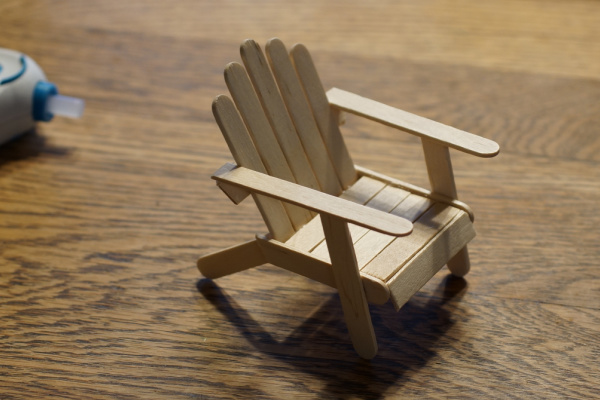
11) Paint and display!
BUT HOW CUTE ARE THESE?!
These diy fairy garden beach chairs totally made my day – and my kids LOVE playing with them. (Yes, my kids are allowed to basically destroy the fairy gardens after I’ve photographed them. What am I actually going to do with 30 fairy gardens? IF they aren’t for the kids…. what are they for? haha.)
![]()
If you make a DIY Fairy Garden Beach Chair, send me a picture!
These chairs are so cute. I was looking for something for my twins and I to make at our lake house. Nice. Thanks for step-by-step, clear instructions. I think even I can attempt this.
I’d love to see pictures if you make some!
Can’t wait to try this! Thanks for the easy to follow tutorial.
I’d love to see a picture!
I want to make some of these for a beach scene I am doing in my xeriscape garden. I’m in Colorado so the chairs would need to withstand the hot dry heat as well as the cold spells in winter. I could bring them in for winter, but would like the display to be out all summer. What kind of paint would hold up best?
I’d just use acrylic paint! If it does get a little weathered looking, I think that would just add to the aesthetic!
I’f you want the colors to stay true, the very last thing you could do is spray clear coat non glossy on the entire chair. This has allowed me to use birdhouses all year long with little or no color change. I just don’t get the hot hot and cold cold you get so forgive me if it doesn’t work but give it a try.
Fantastic tip! Thanks!!
I just finished my first chair today. I had a few problems with it but I finally got it made. I really liked your tutorial on how to make it. Thanks
I’m glad you like it!