How to make a DIY polymer clay fairy door
 I’ve been working on a couple of really small fairy houses that I needed cute colorful doors for, and I decided to try making a diy polymer clay fairy door.
Check out our 10 FAVOURITE PLACES for finding the CHEAPEST fairy garden supplies!
I recently made polymer clay toadstools, and a whole bunch of other clay fairy garden accessories – they were SO easy, I figured doors would be too. (I was right! So easy, this would be the perfect project for a kid, with adult supervision!)
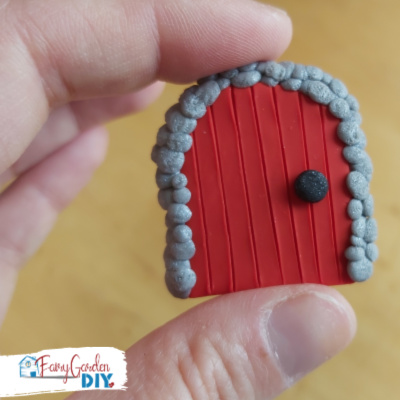
In all honesty, I could have (should have?) made them more ornate, but there’s always next time! I also wish I had used brighter colors. Brightly colored fairy doors are one of my favorite ways to add personality to my fairy gardens.
I’ve made doors from popsicle sticks before, and they’re alright, but they definitely aren’t the same quality as these clay doors – plus I think these will have a longevity that the other doors don’t have.
(THIS POST MAY CONTAIN AFFILIATE LINKS. YOU CAN READ OUR FULL DISCLOSURE POLICY HERE.)
How to make a fairy house door from polymer clay, step-by-step
If you’ve never used polymer clay before, this is the PERFECT project to start with!
What you’ll need:
- bright colored polymer clay
- grey polymer clay
- black polymer clay
- knife or scoring tool
- tiny brush (or toothbrush)
- parchment paper
1) Shape the door
Roll out a ball of brightly colored clay to about 1/4 inch thick.
Cut the door shape out of the clay with a knife or scoring tool.
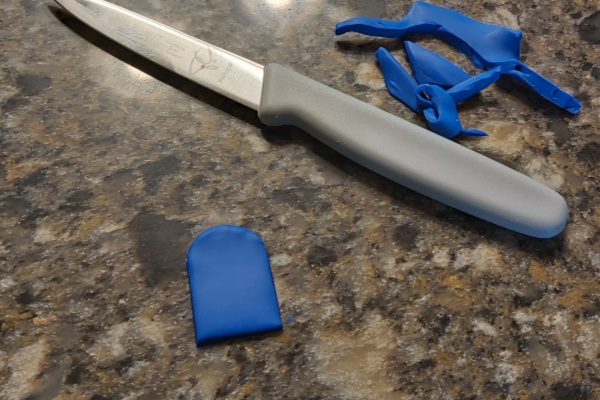
At this point, I realized that I should be creating the door on a surface I could bake it directly on, so I moved it onto parchment paper.
2) Score the door to make “planks”
Well, do this if you WANT planks.
I did.
Maybe you just want a smooth door, or maybe you want to give it some other sort of texture.
I personally like really simple. lol.
![]()
3) Pinch off tiny balls of grey to create “rocks” around the door jam
Use different sized balls, and press them firmly to the door and to each other. I was worried they wouldn’t hold, but they are doing great! (And one door even got dropped by my toddler.)
Work all the way around the door, and go back to fill in any weird gaps with smaller balls.
![]()
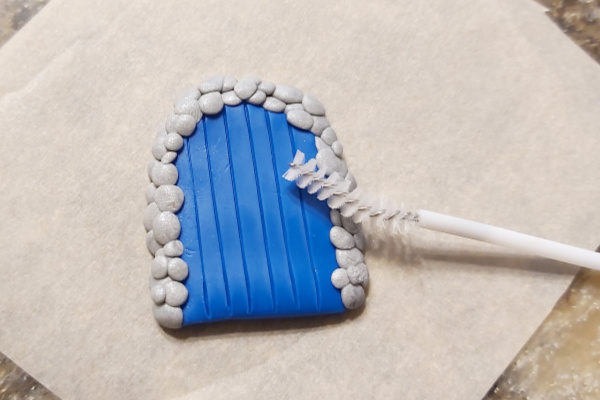
4) Texture the “rocks” with a small brush
An old toothbrush would work just great for this if you don’t have a bottle brush.
It’s surprising how much more real some texture can make things look!
I used this opportunity to gently press the rocks together even harder, which didn’t seem to hurt anything at all.
5) Create a tiny doorknob from black clay
Of any color of clay really. Black was what I had on hand.
Make a small ball and press onto the door.
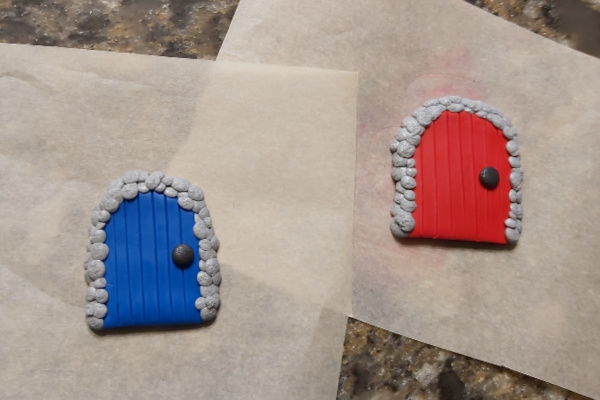
6) Bake according to clay package instructions
My package said 15 minutes at 275 degrees for every 1/4 inches thickness, so that’s exactly what I did and they turned out great. No shiny burnt spots at all!
(There was some shimmer in my grey “rock” clay, and it rubbed off my fingers onto the black doorknobs but that’s fine by me, I’m sure fairies like shimmer…)
Next time I’ll try making slightly “fancier” fairy doors from polymer clay, but for now, these ones are perfect!