How to make a fairy garden in a teacup
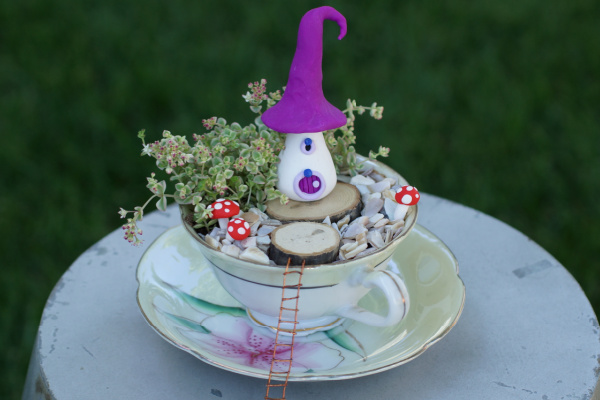
This tiny indoor fairy garden only takes up a bit of space – but it’s just as magical as a large fairy garden in my opinion. A fairy garden in a teacup is perfect for those without much space OR for those who just want to a simple project that won’t take days to complete.
Check out our 10 FAVOURITE PLACES for finding the CHEAPEST fairy garden supplies!
It would be SO MUCH FUN to create these as a project for a fairy garden themed birthday party!
When I was younger I collected “made in occupied Japan” teacups… now I have all these pretty old teacups lying around that I will literally never do anything with… this one looked like it REALLY wanted to be a home for fairies.
I also happened to have a few itty-bitty fairy houses kicking around – I had made them following this tutorial when I was first getting into using polymer clay! So this was a great project that really didn’t take too long.
There isn’t a ton of STEPS to follow to create a fairy garden in a teacup.
After all, it’s a tiny little space and I think the key is to just keep it very simple.
Of course, I forgot to take in-process photos of this project, but honestly, it was so simple – I can highlight the main things you want to think of below.
(THIS POST MAY CONTAIN AFFILIATE LINKS. YOU CAN READ OUR FULL DISCLOSURE POLICY HERE.)
Choosing your teacup
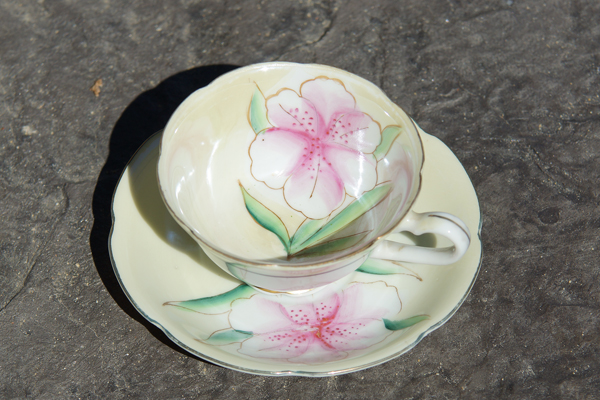
Try to choose a teacup that has a wider top opening if you can! This gives you more space to work with.
I also wanted one that had a pretty pop of color vs a plain white or black one. I LOVE the gold edge on this one… I think it’s so quaint.
At the same time, I was a little disappointed I covered up that beautiful flower with dirt. Next time I’d try to get one with the flower on the OUTSIDE of the cup.
I’m so happy the same design was on the saucer, I love that detail.
Choosing a plant (or plants) that will do well in a teacup
Your plant (or plants, but I mean, it’s a teacup, so multiple plants are going to be tricky) is SUCH an important part of your fairy garden. Even tho it’s the tiny fairy garden accessories that catch your attention, your plant takes up the empty space and gives your fairy garden a “real life” feeling.
Somehow, real plants make it all more believable (to me anyhow).
I do have a guide to choosing the best plants for a fairy garden, but in this case, I honestly would just choose one and make it a succulent.
Succulents need less attention (and water) and they do a lot better in tiny spaces than some other plants that need to be able to spread out. Succulents also don’t mind being pruned when they start to take over!
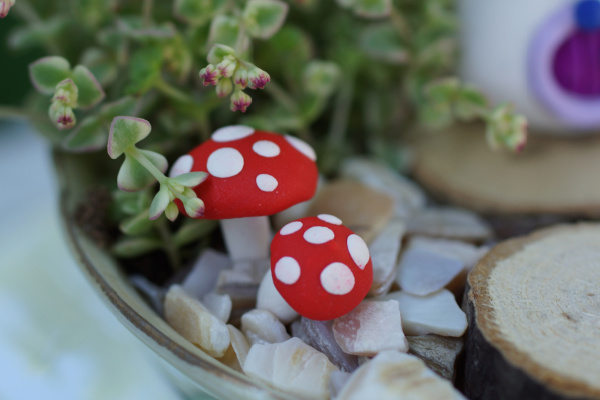
I chose a (get the name of the tiny plant) because I loved the wild look it had AND I thought the little tiny red flowers added such a great pop of color that went so well with the toadstools.
You’ll want to place your plant to one side of the teacup to make sure there’s room for you other garden “stuff”!
If you are worried about overwatering, place a few large pebbles in the bottom of the teacup to allow for drainage before you put your dirt in. (I didn’t bother with this because I am NEVER guilty of overwatering!)
Cover up your dirt if you want
I personally hate having the dirt show in my fairy gardens! You COULD just leave it, that’s fine too.
For this teacup fairy garden, I used crushed seashells (tiny rocks or sand would work too, but I just think crushed shells have that “magical shimmery” look) and tiny unfinished wooden disk I found at the dollar store. (You can also get them on Amazon.)
The wood disks made a great flat place for the house to sit.
Choosing accessories for your teacup fairy garden
You want to keep the accessories simple, because it’s a very small space, after all! You can overwhelm with too much, and then the cute details get overlooked.
I went with a tiny house, some toadstools, and a ladder.
I already had the toadstools kicking around… here’s a tutorial on how to make polymer clay toadstools for fairy gardens! They are such a GREAT way to add color and these ones are super simple to make. You can whip up 10-15 in 20 minutes!
The little ladder was easily the hardest thing to make for this miniature teacup garden, and even that was not HARD once I thought about how to do it.
How to make a ladder for a teacup fairy garden
To make this ladder I used craft wire, super-glue, tweezers, and some Sculpey clay (just to hold it still while I worked).
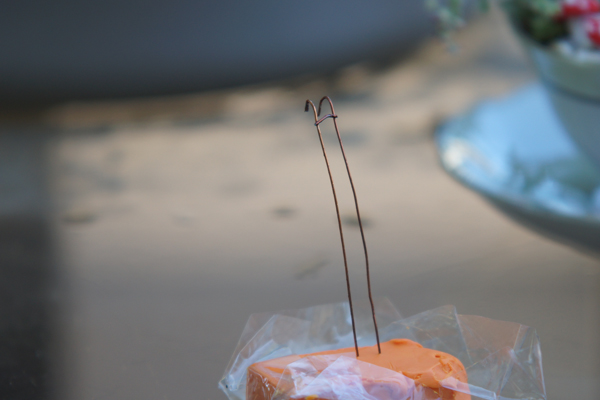
First I cut 2 pieces of craft wire to the right size and bent the ends to hang over the edge of my teacup.
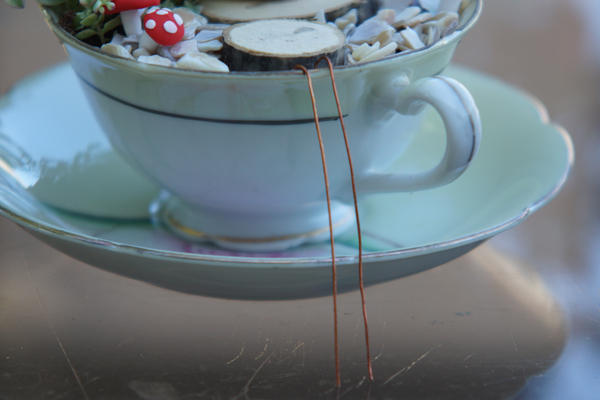
The most difficult part was figuring out how to hold the ladder still while I worked!
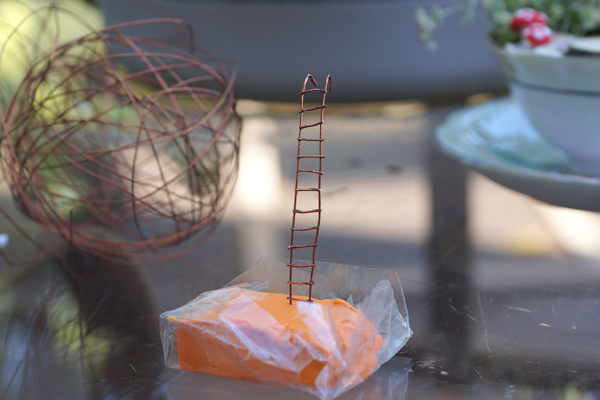
I ended up sticking the bottom of the wire into a block of polymer clay – and that worked perfectly.
Then I just snipped tiny “rungs” and super glued them in place using tweezers. The whole thing took less than 20 minutes!
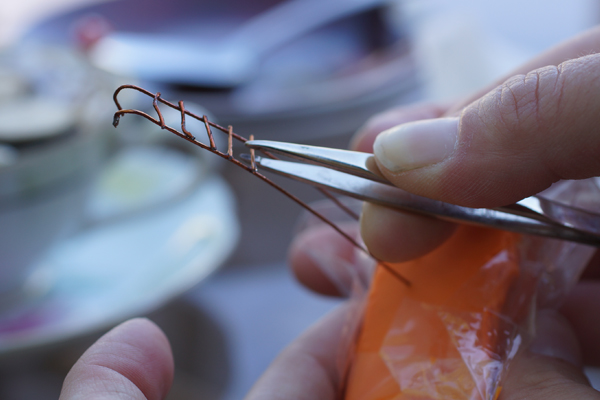
I’m not super patient but I let it dry for 15 minutes before I touched it – and I LOVE how it turned out!
This fairy garden in a teacup is probably one of my favorite fairy gardens I’ve ever made, just because it’s simple and tiny and still SO adorable… and it’s sitting right in my kitchen.
If you’re looking for other indoor fairy garden container ideas, I have a whole list!
Have you made a fairy garden in a teacup? I would LOVE to see pictures!
![]()
![]()