DIY Mini Garden Tools for a Gairy Garden
This weekend my kids and I figured out how to make miniature garden tools for fairy gardens!
Check out our 10 FAVOURITE PLACES for finding the CHEAPEST fairy garden supplies!
I saw a tutorial for DIY mini garden tools years ago, but it used some pretty heavy sheet metal and looked quite complicated. (Not like something you’d make in 20 minutes or less with your kids, which is what I was after.) Sure, sheet metal would be more durable – but the little shovel and rake we made will stand up just fine outside for a summer or two, or it could last for years in an indoor fairy garden.
We were inspired to make the fairies a shovel and rake because recently we made polymer clay veggies for them to “harvest”… and obviously they needed garden tools to go with!
Because we were making these mini garden tools on the spur of the moment, we just used things we had laying around the house. (I like it best when my fairy garden addiction doesn’t cost anything LOL.)
(THIS POST MAY CONTAIN AFFILIATE LINKS. YOU CAN READ OUR FULL DISCLOSURE POLICY HERE.)
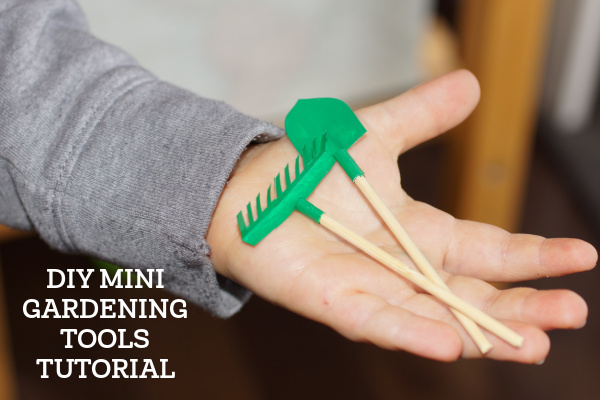
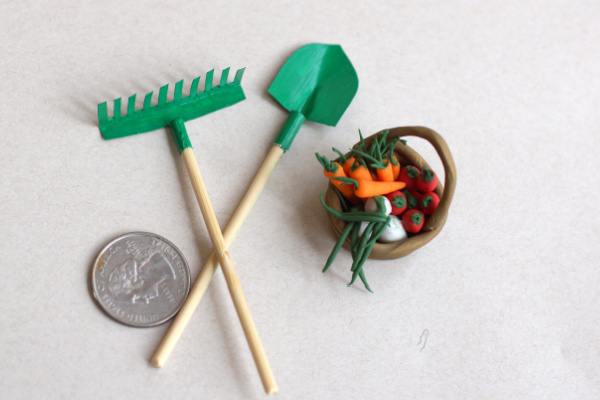
(The hand above is a 4-year old hand, so those garden tools are a little smaller than they look!)
Here’s what we used to make the fairies their garden tools:
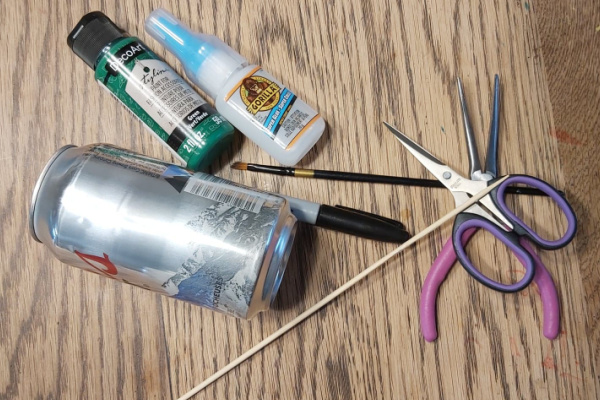
- an empty can
- a wooden skewer
- super glue
- sharp scissors
- pliers
- black marker
- paint + paint brush
- rubbing alcohol + q-tip (optional, not pictured)
How to make a miniature shovel
Neither of these mini garden tools were HARD to make, but the shovel was a little faster then rake.
First I cut a square of aluminum out of my empty can. (If you are doing this with kids, an adult should do this part. Be careful, as cutting into the aluminum creates a VERY sharp edge. It is easy to cut yourself on this.)
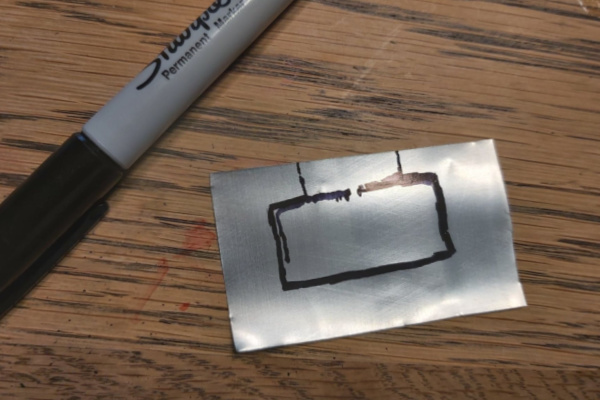
I drew a rough “spade” type shape on my aluminum, just to give myself an idea of where I was going to cut.
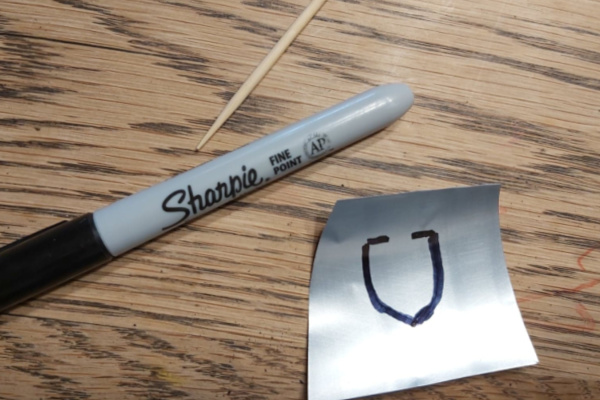
You want to leave the top along the spade shape when you cut it out.
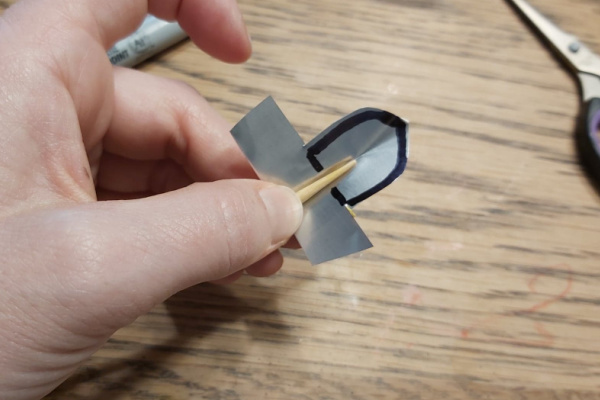
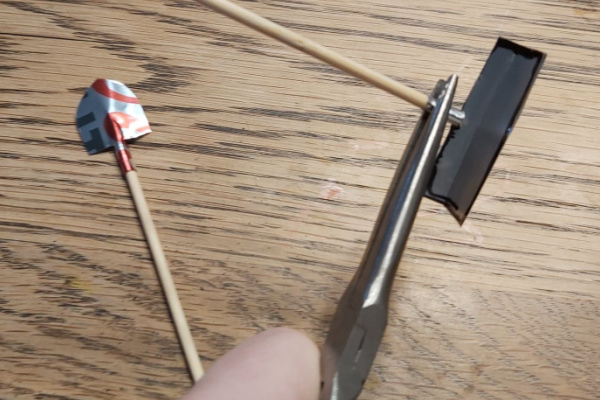
This will give you something to wrap around the handle; to attach the spade to the handle – like this:
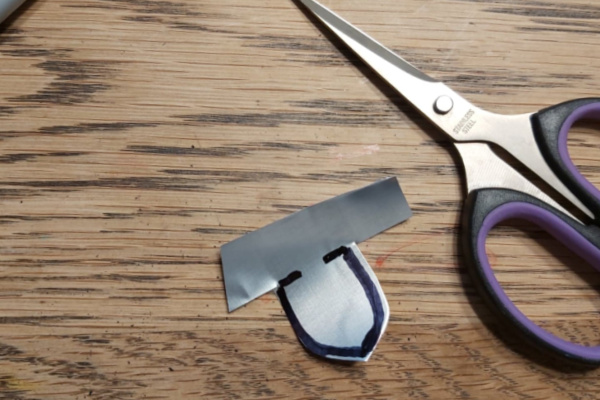
I suggest pressing your handle into the center of your spade to make an indent. Kind of bend the spade gently around the stick. In learning how to make miniature garden tools, made one spade WITHOUT doing this and wasn’t quite happy with it.
It turns out it just needed a dent to make me happy LOL.
After you make your dent, you can trim your “wrapping edges” down be just about as wide as the spade.
It should look something like this:
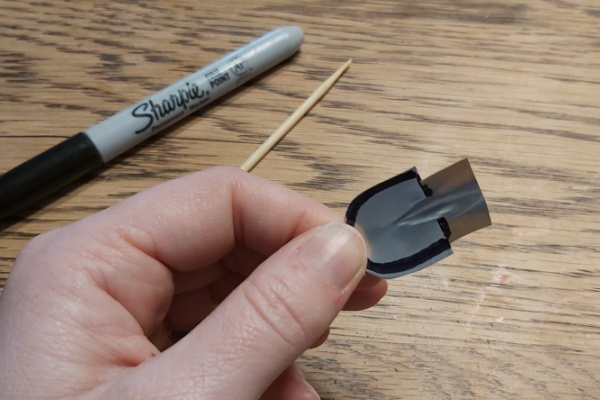
Apply super glue at the bottom of the handle, where you will wrap the extra aluminum flaps. I found it necessary to use a pliers to hold the flap in place while the glue dried (about 30 seconds).

Lastly, I used rubbing alcohol and a q-tip to remove the black marker from the edges of the shovel.
If there hadn’t been beer can markings all over the back of it, I wouldn’t even have needed to paint it! It was super cute as a little plain silver shovel.

The shovel alone would have been a great addition to my fairy’s garden, but we had a lot of empty aluminum can left over, and we thought, why not make a rake too, since the shovel only took about 10 minutes anyhow.
How to make a miniature rake
We followed the exact same process to make the rake, except I struggled with what sort of shape to cut out first. (I am CREATIVE, not ARTISTIC, and there is a huge scary difference in those things haha.
Don’t laugh, but here’s what I started with for my rake:
I cut out the basic shape, larger than I THOUGHT I would need because it’s easy to trim down later.
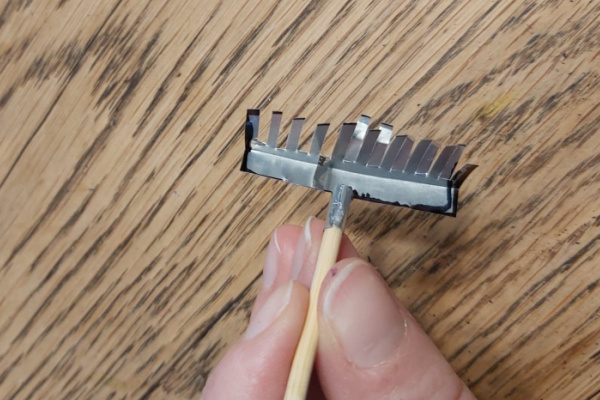
Then I bent the aluminum (using pliers) where I figured the “teeth” would start.
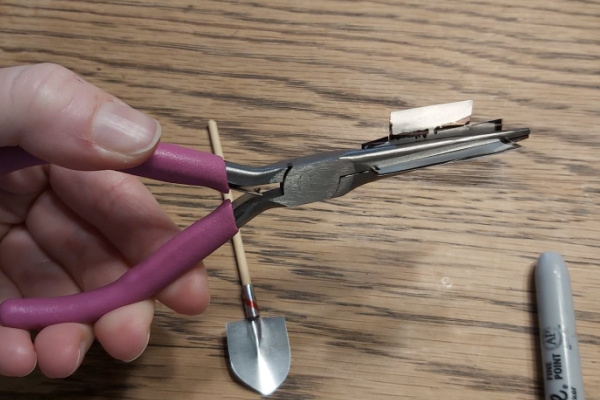
I super glued the flaps to the handle, just as I did for the shovel.
Using the sharp tiny scissors, I snipped along the front of the rake. creating lots of little “teeth”. The last “tooth” ended up weirdly wide, and I had to trim it down.
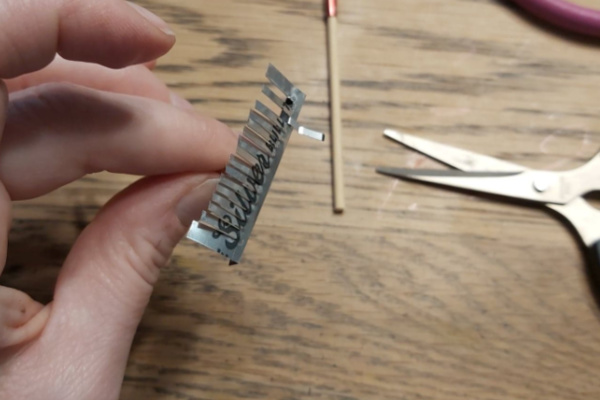
I removed every second tooth by bending them all forward and then backward, carefully. There was no need to cut them out – they just broke off from bending.
This gave a MUCH cleaner finish than trying to cut them off!
I removed the black marker again, with rubbing alcohol.
I honestly loved the way they turned out – and I sort of wished I had found plain aluminum to make them so they wouldn’t have to be painted. (There is enough plain aluminum on a Coors light can, just FYI to make ONE plain silver mini garden tool. The first shovel I made – the one without the dent – was perfectly un-marked. But that one just didn’t look as REAL, and I let my 2 year old play with it, and she destroyed it.)
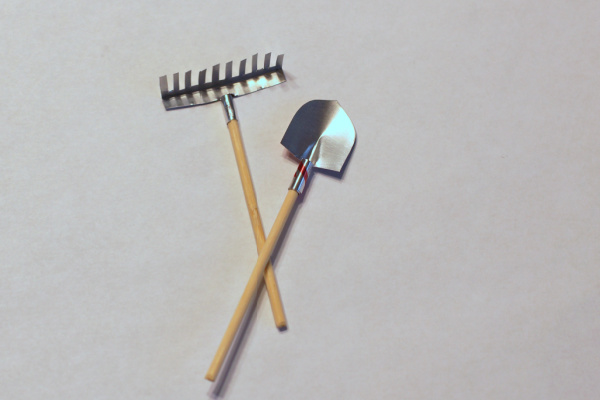
Since they were all Coors light-esque, I did paint them.
I was super nervous about it, but I love them painted too, phew. (Now that I see the images with the camera flash, they look like they need another coat of paint… but I still love them.)
Here they are with the mini garden vegetables we made last week! AAGGHHH! SO CUTE!
I purchased a set of fairy garden sized mini garden tools on Amazon this past summer, they were not any more durable than these ones we made – AND it was soooo much more fun (and satisfying) to create them ourselves.
I can not WAIT until summer time so we can put these in a fairy garden!
I think it would be super easy to use this same method to make a hoe also, I just ran out of time.
If you use this tutorial to make mini gardening tools, I’d love to see a picture!
You might also like:
How to Make Mini Pots of Flowers for Fairy Gardens
The EASIEST (+ Most Durable) Stone Fairy Houses
Cute Polymer Clay Ladders for Fairy Gardens
![]()
![]()
Great, I’m 74 now ,and still active but get bored,I’ve started making gnomes from clay and they are quite cute .But now ,thanks to you I can add a little magic to them .thankyou So Much.xx
Oh that sounds adorable!!!
Love em. I am thinking about starting a fairy garden//house outside for my granddaughters. These will be perfect to add to ours. Perfect tutorial. Thanks.
Fairy gardens are really THE BEST projects to do with grandkids!
I used sandpaper to remove the print from my shovel. The plus is that it gives it texture and a weathered look. Thanks for the tutorial
Oh I love the idea of giving it a weathered look
What an adorable idea! Your directions are Fantastic too! Thank you!
oh yay! I’m so glad you thought so <3
Don’t they have sharp edges?
yes, a little bit sharp. painting them helped!
Are the edges still sharp?
yes, a little bit. Painting them really helped!
If I am going to make the basket and veggies from clay, will they hold up outside in my fairy garden?
you’ll probably have to seal them if you use anything besides polymer clay. polymer clay bakes into a hard plastic and it does just fine outside!
What an adorable idea! Like Agnes, I make gnomes and these will be a PERFECT addition to the garden gnomes.
Thank you so much for sharing.
I’m so glad you enjoyed it!
You can get paint off the cans using a cotton ball and nail polish remover. Beautiful turorial. I love how simple it was and that you used everyday materials. I can’t wait to make my mini shovel & rake. Thank you for sharing.
Thank you for the great tip!
I love your tutorial. Thanks for sharing. I made 3 shovels already. Anyways if you use acetone (nail polish remover) on a cotton ball, you can get the paint/print from the cans to come off. Again, thanks for sharing.
Oh what a great tip! I would have loved to have left mine “natural”- I’ll try that!