I fell in love with the idea of a broken pot fairy garden the first time I saw one, of course. (I’m sure you did too!)
Check out our 10 FAVOURITE PLACES for finding the CHEAPEST fairy garden supplies!
I think a broken pot is one of THE MOST awesome outdoor fairy garden container ideas there is!
I have ALWAYS wanted to make one, and never gotten around to it – mostly because I didn’t have any big old broken pots laying around and they’re honestly not that cheap, so buying one to break hasn’t been high on my to do list, haha.
In March of 2021 I decided this would absolutely be the year I learned how to make a broken pot fairy garden, and I posted on FB that I was looking for some old broken pots.
Fortunately, someone responded right away that they had two cracked terracotta pots I could have, and I asked my dad to pick them up the broken post on his way through the city. I mentioned that they were broken, and that was no problem, – they were supposed to be broken.
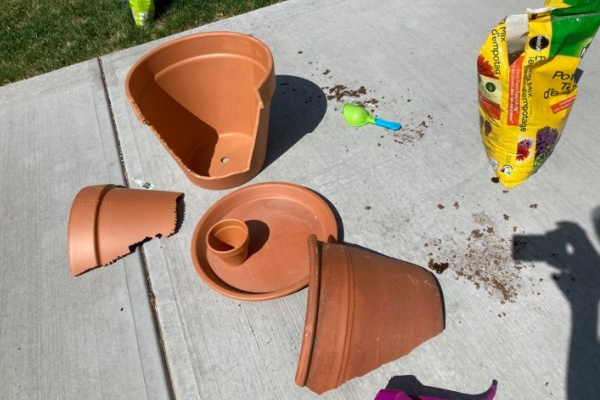
Unfortunately, I hadn’t explained to my dad that I wanted the broken pots *mostly* still intact, and he just plopped them into the back of his truck, where they smashed to absolute smithereens on the way home 😂. This is what I got:

Sooo, I bought a $37 terracotta pot and enlisted my husbands help in breaking it properly, since I wasn’t going waste the $37 and I REALLY wanted to end up with an adorale broken terracotta pot fairy garden.
We had no idea how to break a pot for a fairy garden! This is what we learned:
How to Break a Pot for a Fairy Garden
Wear safety glasses when you break a pot to make a fairy garden – the terracotta pieces can fly around even if you’re hitting it carefully!
I’ll add the images on how we broke this pot when I can get them off my husband’s phone lol.
I had heard that smashing the pot with a hammer is a good way to break it, but honestly, I was terrified to do that and destroy it and have to buy another pot!
We both agreed that using a Dremel would be the BEST way to break a pop for a fairy garden, but we didn’t have a Dremel on hand and I wanted to get on with it – hahaha.
My husband used a drill to make holes in a line where we wanted the pot to break, and then gently banged along the holes with a hammer until the pot broke exactly how we wanted it to.
This was a little time consuming but I’m glad we did it!
Before you begin, you’ll want to collect your materials.
Here’s what you need to make your broken pot fairy garden:
- Large terracotta pot, broken carefully (see above)
- terracotta saucer
- extra broken pot pieces
- silicone sealant (I didn’t have this, but I WISH I had used it!)
- dirt
- fairy garden décor
It doesn’t really take much as far as materials! It DOES take a bit of creativity though.
How to Make a Broken Pot Fairy Garden in 4 steps
1) Plan your layout with the pieces you have:
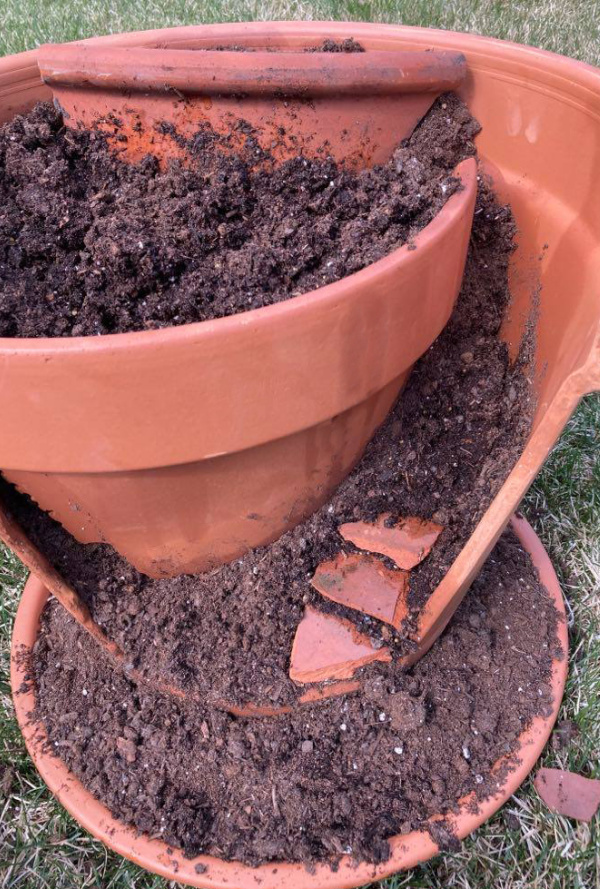
I started by laying out the large pieces I had available to create the main structure of the garden.
I did buy a terracotta plant saucer to use as the base of my broken pot fairy garden and I’m glad I did. IF anything, I wish I’d got an even larger one!
I don’t have images of arranging the pieces in the pot, but if we’re honest, I didn’t know what I was doing haha.
The pieces wouldn’t stay in place – of course – until I added the dirt – so I had to add dirt and hold them in place at the same time… which made taking pictures impossible.
I’ve since learned that you can silicone your pieces in place before adding the dirt, and I would never make another broken pot fairy garden without doing that. (Hindsight and stuff LOL.)
Because my husband had broken the pot so carefully, there WAS no tiny little shards to use as stairs.
Fortunately, I had that whole box of broken pieces from the free post my dad had picked up for me, and I used some of those pieces to make the stairs and also one larger piece from those post to make the very top “level” of the garden.
(It’s safe to say that creating a broken pot fairy garden will take MORE pots than just the one main one you break!)
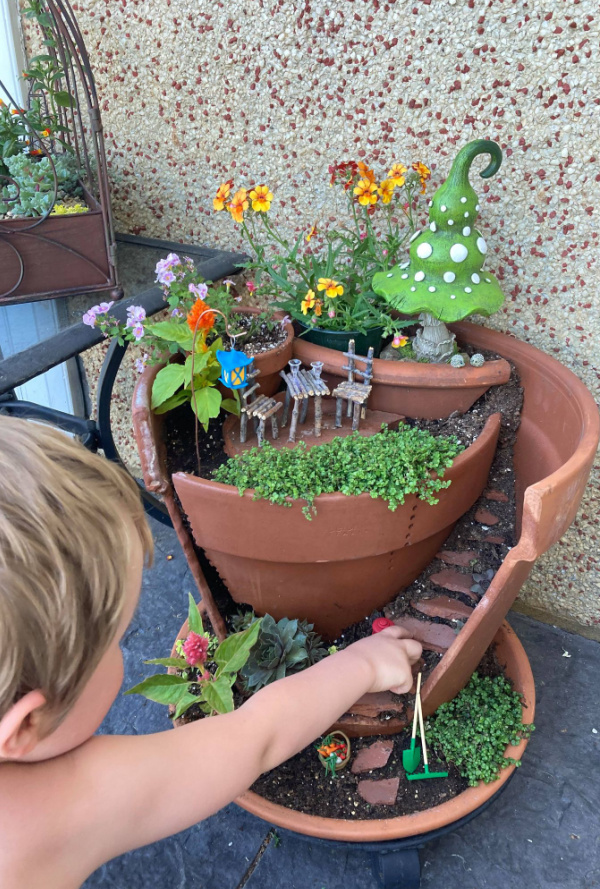
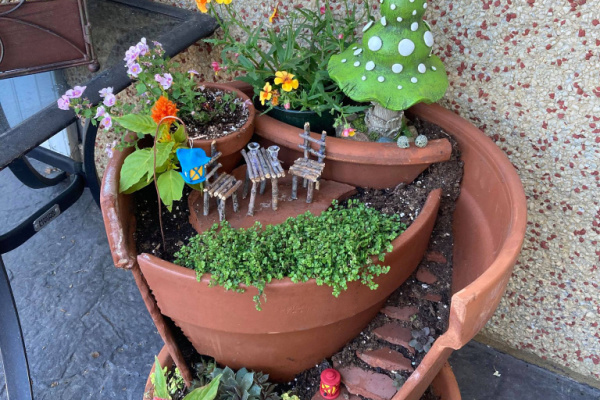
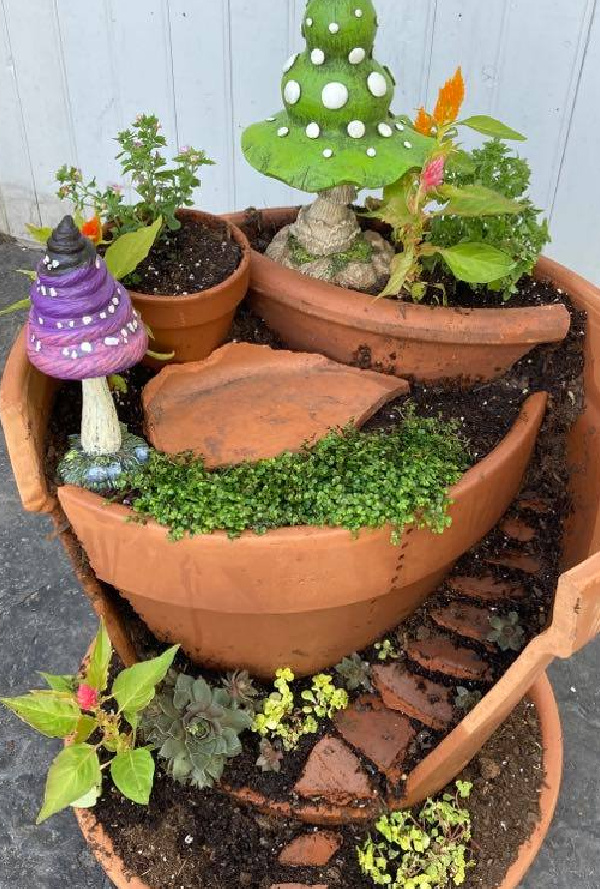
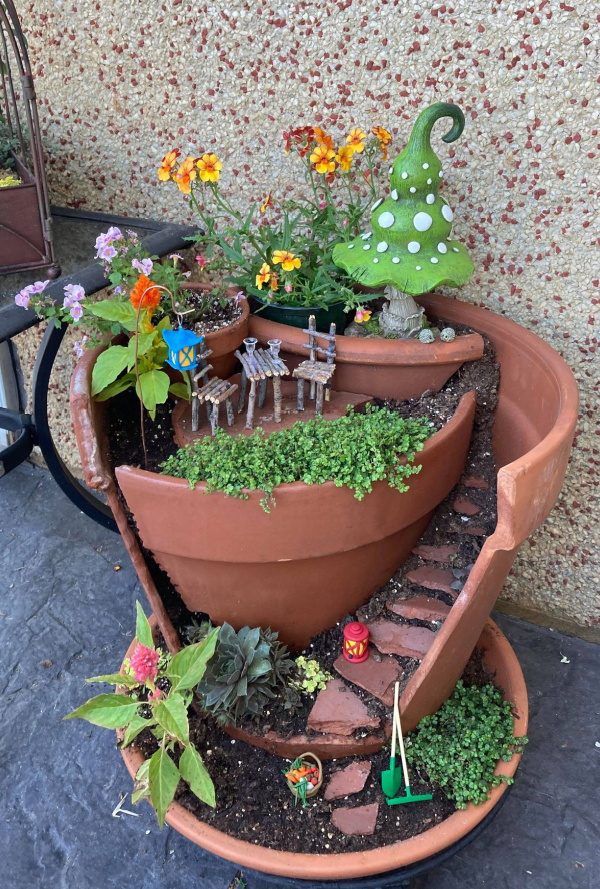
I ended up with 4 “levels” to my garden – the “top” level, the largest “middle” level, the “steps” level, and the “ground” level.
2) Fill with dirt:
When placing the stairs, I found it was really helpful if the dirt was VERY wet.
You’ll want to wet all your dirt before putting it into the pot – don’t be afraid to over wet it really, since the terracotta will draw moisture out of it anyhow – because it is REALLY hard to wet the dirt once it’s inside the pot. The water just runs out of all the cracks and washes your dirt out with it. (Sigh. More hindsight.)
Once I got past the whole disaster of pot pieces not staying in place and dirt washing out everywhere, I was ready to add plants!
3) Add your plants:
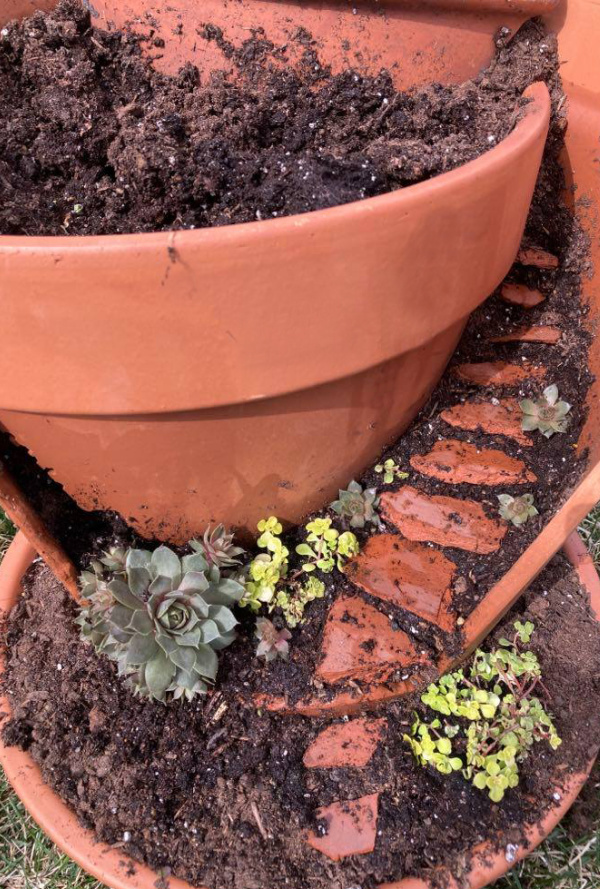
I chose succulents for the places with the most sparse dirt – the “steps” level is sort of at an angle – because it is just MUCH harder to keep those places wet, and drought resistant plants will likely thrive better here.
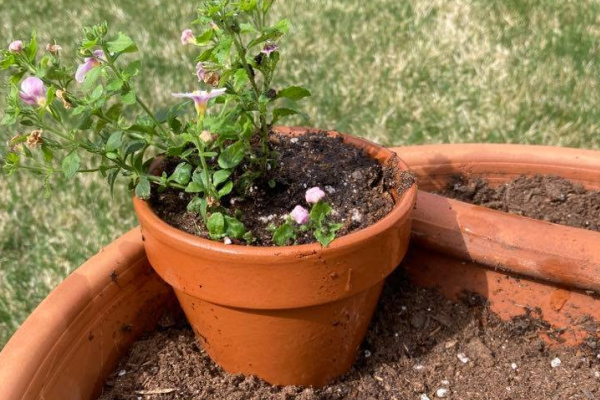
I added a pink bacopa in it’s own pot to the large “middle” level, because after seeing the dirt washing away disaster that was happening when trying to wet the dry soil, I figured this sort of large plant really needed something to contain moisture around it.
I used a large flat piece of broken pot to make a “seating area” in this level also and planted some ground covering (name of green thing) along the edge of the largest “middle” level. The (name of green thing) will creep over the edge of the pot as the summer goes on – I think it will look awesome!
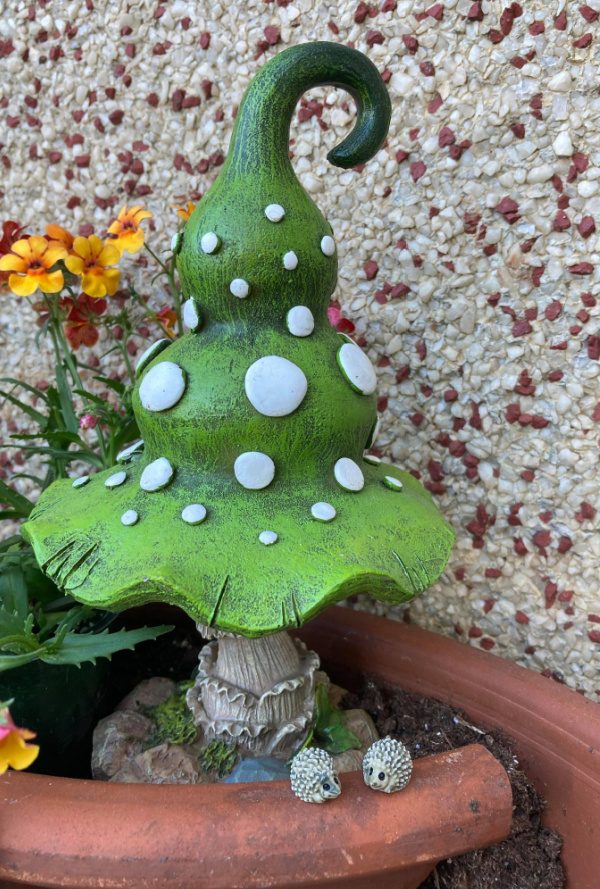
To this level I also added a cute decorative mushroom and a (name of fluffy colorful thing).
I added another (colorful fluffy thing) and some more greenery to the bottom level.
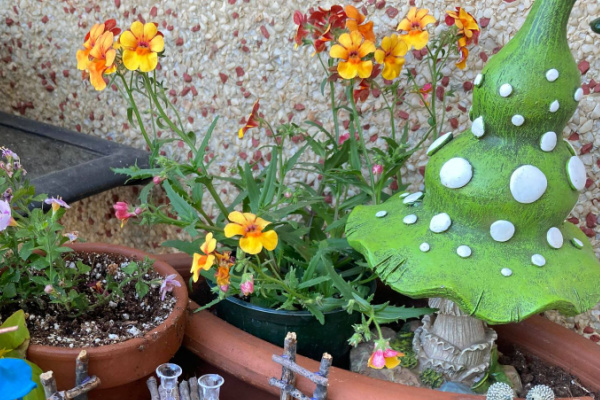
In the very “top” level, I planted some globe basil and a couple (name of fluffy colorful things), and placed another adorable decorative mushroom. I LOVED how it looked, and I really believed this was a solid set up…
But it was not meant to be and NO MATTER what I did I could not get the globe basil and the (name of fluffy colorful thing) to be happy up there in the top-most level.
Again, I think it was due to the lack of pre-wetting the soil. (The plants weren’t large enough for it to be due to crowding at this point.)
Within a week they were basically dead, and I had to replace them with another plant in it’s own pot, to retain moisture. I chose a bright yellow nemesia, because they are one of my favorites and I thought a little more height wouldn’t be the end of the world.
I actually like the broken pot garden even better with the nemesia!
4) Lastly, add your fairy garden décor:
I let the fairy garden in a broken pot sit for a week to see how all the plants would adjust… and then we added our DIY fairy garden accessories!
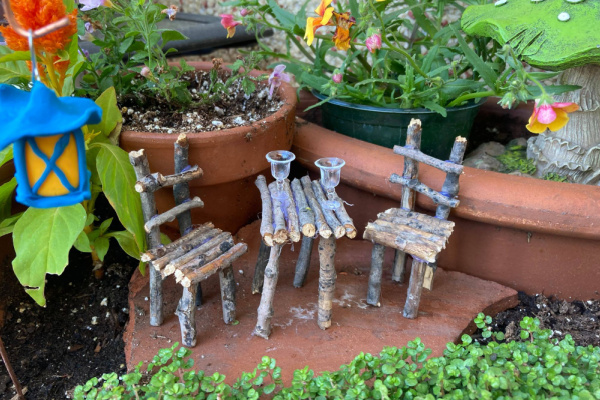
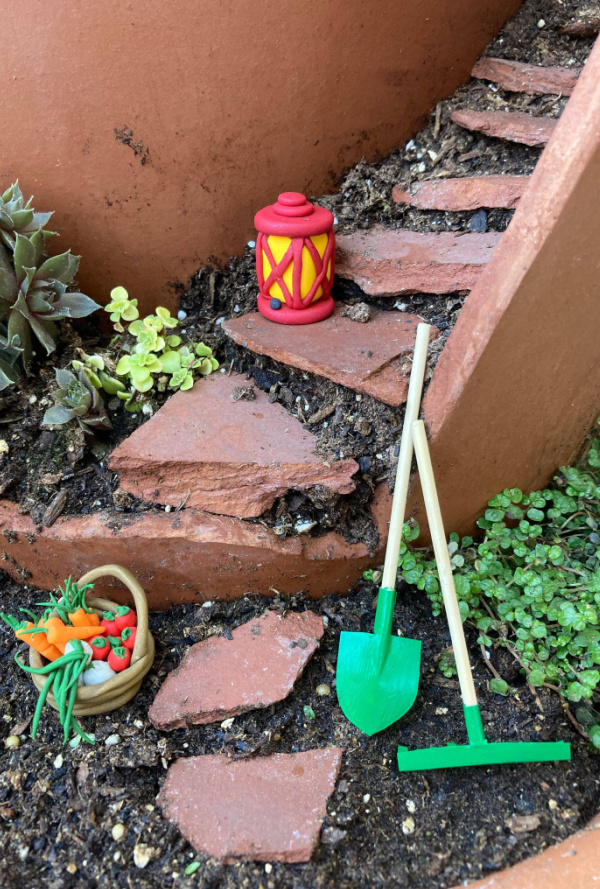
We made a couple polymer clay lanterns, a twig table + chairs, a set of mini-garden tools and some polymer clay veggies.
Then we added a set of fairy-sized wine glasses and a couple adorable miniature hedgehogs! (We glued both of these things down.)
My kids and I are SO PLEASE with how this broken pot fairy garden turned out!
I just CAN NOT love these little hedgehogs more:
And the twig furniture we created:
And the bottom level “garden” décor:
What you DON’T see in the pictures… my kids get to play in the gardens as soon as I’m done snapping my pictures for this website.
The gardens don’t look the same for long hahaha.
This garden is obviously not FOR a child. This is very much a more adult garden. The sharp terracotta is not appropriate for kids, but I let them take the hedgehogs out and play with them away from the garden. Building a fairy garden for a child has different considerations than when building one for an adult!