It’s not really “fairy garden season” here yet (ok, it’s not at all fairy garden season here yet), and we’re in the awkward part of the spring where I buy plants because I can’t wait any more and then I have to take them in and out of the garage every morning and night for three weeks.
Check out our 10 FAVOURITE PLACES for finding the CHEAPEST fairy garden supplies!
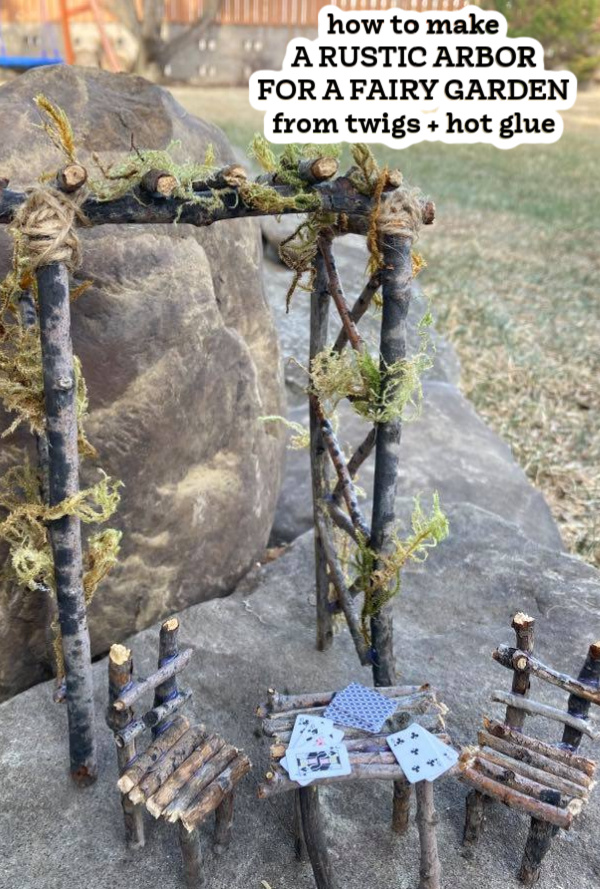
It’s definitely not my FAVORITE season, haha. BUT it’s a great time of the year to craft some fun tiny décor that we will use when we build our fairy gardens this year. This little rustic twig arbor is going to be adorable in the old wagon garden we are planning(or maybe the wheelbarrow garden)!

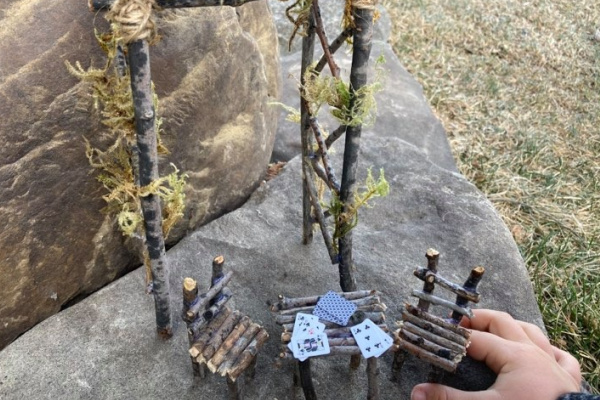
Since there are no gardens ready for fairies yet, we just had to set it up on a rock to see what it would look like with a tea party underneath it!
(We have already purchased what we need for the wagon garden, a broken terracotta pot garden, and a bird cage garden! I’ll be hard pressed not to start putting them together in the next couple weeks lol.)
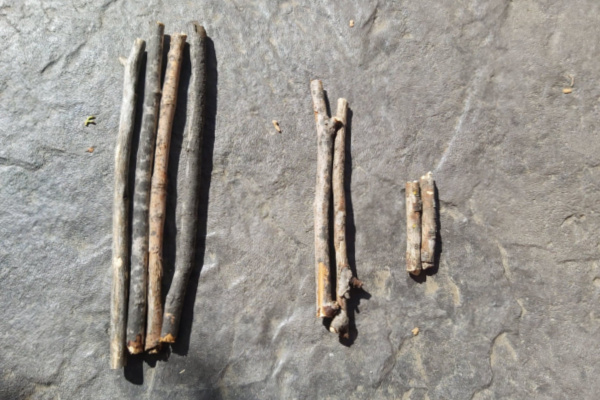
We’ve had a pile of sticks sitting around waiting to make something for the fairies for weeks, and today was a good day to start!
(THIS POST MAY CONTAIN AFFILIATE LINKS. YOU CAN READ OUR FULL DISCLOSURE POLICY HERE.)
How to make a twig arbor for a fairy garden
Start by collecting your supplies.
To make this twig arbor we used:
-
- twigs
- snips / small saw (to trim the twigs)
- hot glue
- moss
- twine
I trimmed 4 long twigs to the same height (as tall as you want the arbor to be – go a little longer if you want to be able to sink them in the dirt).
I trimmed 2 medium twigs to the same length (for as wide as you want your arbor to be).
I trimmed 2 short twigs to the same length (for the depth of the arbor).
The I glued the sides together like this:
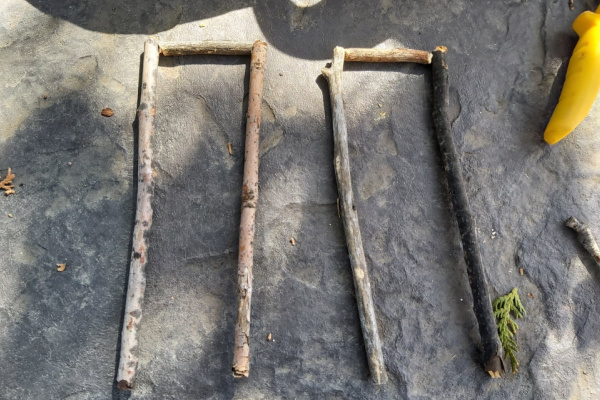
I’m always building as I go, so here I trimmed 4 more short sticks to the length of the original 2 short sticks and glued them in place as well.
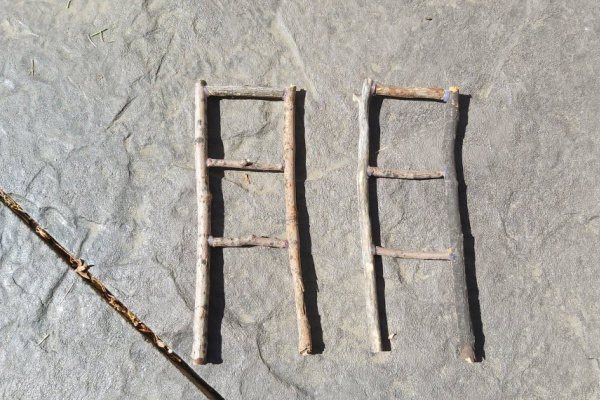
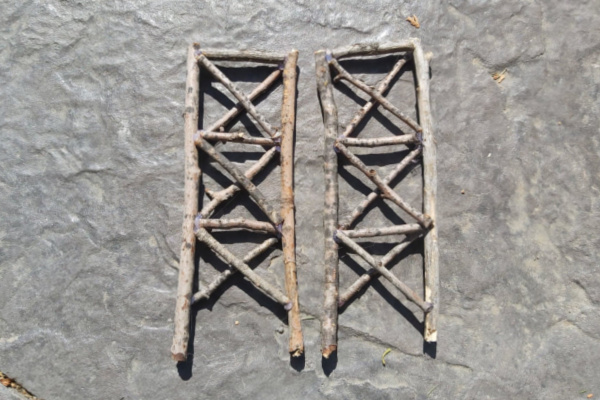
I decided I would like a little more decoration on the arbor, so I added X’s in each of the boxes I had created.
I glued the sides of the arbor together using the medium length pieces to create the top – but it looked very bare bones, so I added 5 short sticks across the top as well.
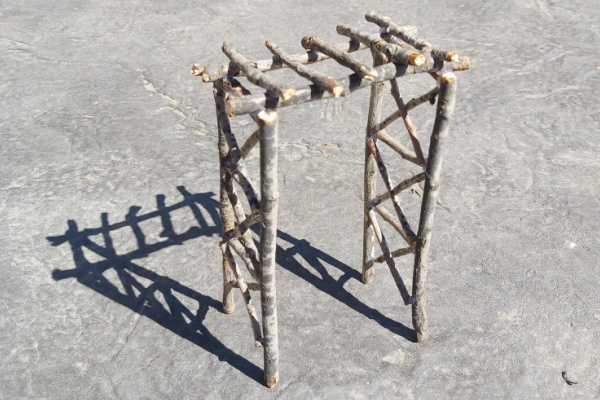
Because I used a lot of hot glue to hold the arbor together, I wrapped the corners with twine to hide it.
Make sure you tie the twine tightly, and tuck in the end pieces. Secure with a dob of glue at the back if you can.
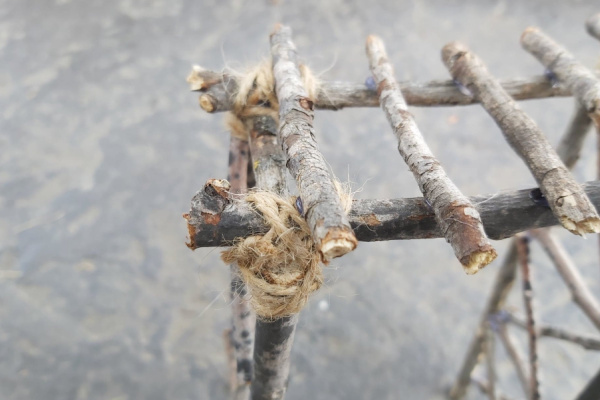
I sort of thought I’d wrap every single glued joint with twine, but the wrapping took a lot longer than I thought it was, and looks quite bulky (which is fine in a few places, but I didn’t think it would look great ALL OVER).
So to hide the rest of the glue, I used moss!
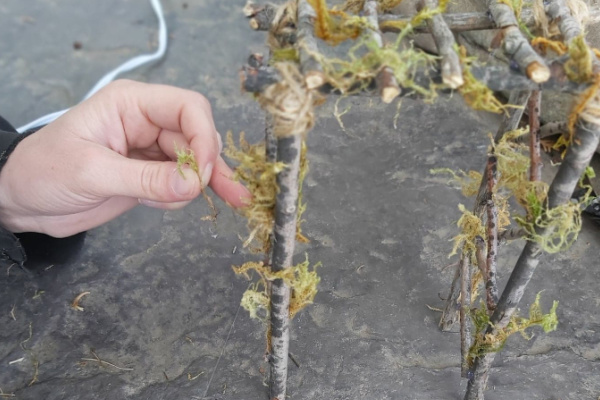
I probably could have used even MORE moss, but the sun was going down, and my hands were getting cold – it turned out pretty cute tho!
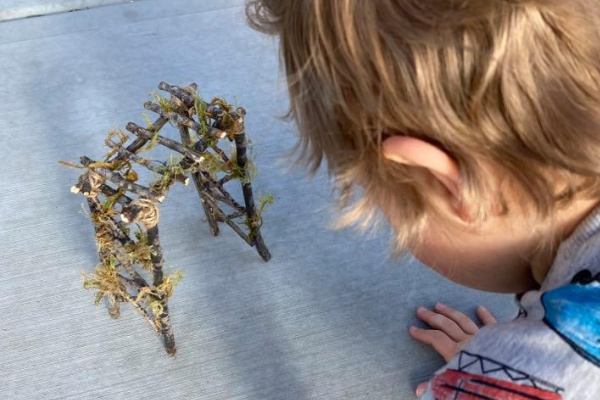
![]()
My kids thought so too.
Of course, we made a mistake we make ALL THE TIME…
We didn’t check to see if we OWNED any fairy furniture at this particular scale.
You know, something that would fit really well beneath the arbor without looking awkward.
We didn’t, of course. haha.
This champagne patio set was pretty close but it was on the small side, and the tea cups were sort of weirdly large on it.
We had left over sticks, so we quickly put together a set of twig fairy furniture!
I can’t wait to share how it looks in it’s place in a fairy garden this summer!
I you’re as into fairy-garden-creating as we are, you will want to check out these other tutorials:
35 Fairy Houses to DIY This Summer
Cute Polymer Clay Toadstools
Popsicle Stick Fairy Garden Decor
30+ Fairy Garden Ideas for Kids
How does this hold up if it rains?
Mine did! What it did NOT hold up against was the kids throwing it around LOL.