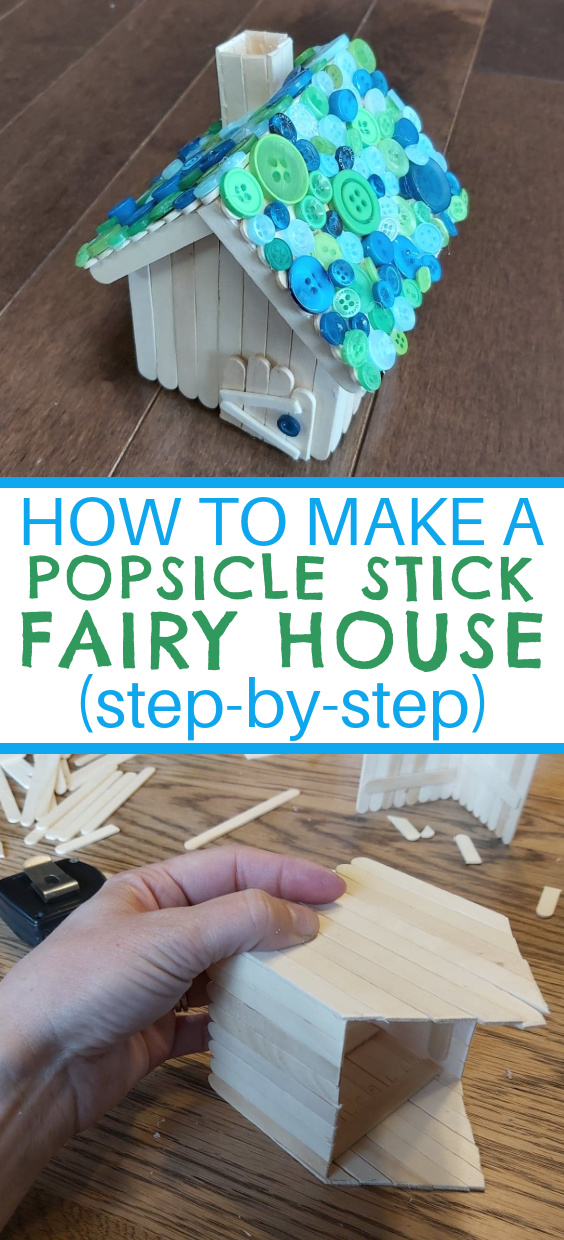
How to Make a Fairy House From Popsicle Sticks
If you’re making a fairy garden for a child (or for yourself) and want to keep it cheap and cheerful, you literally can not go wrong with popsicle stick fairy garden accessories. A popsicle stick fairy house is SUPER SIMPLE to make, and you can decorate it literally thousands of ways – so they are very versatile.
Check out our 10 FAVOURITE PLACES for finding the CHEAPEST fairy garden supplies!
I looked around online for a good tutorial on how to make a fairy house from popsicle sticks, and there are some great (complicated) designs out there… but I wanted SIMPLE. If you’ve spent any time on this website, you know I don’t really have the patience for measuring or planning 😂. All the instructions I was finding were requiring me to pre-measure and pre-cute – UGH.
I made my simple popsicle stick fairy house without any measuring and I think I’ve recorded my process well enough that you should be able to re-make it with no trouble.
(THIS POST MAY CONTAIN AFFILIATE LINKS. YOU CAN READ OUR FULL DISCLOSURE POLICY HERE.)
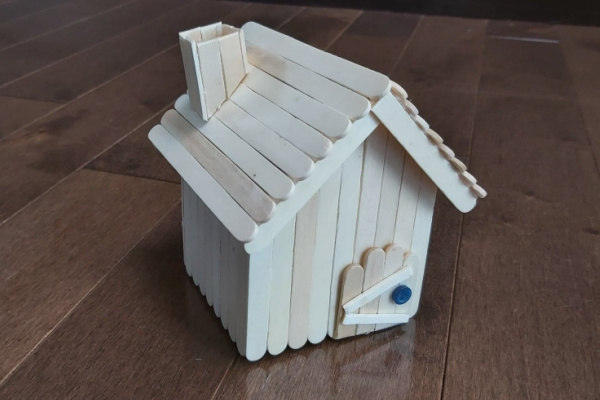
Note that these houses, made with hot glue – like I did – will not be CRAZY DURABLE outdoors. If you’re looking for a basically indestructible fairy house I recommend making these stone houses, or these concrete houses. Recently I also made a twig house that I think will fare very well outside!
Popsicle stick houses should only be counted on to last one season – but if you want to TRY and get a few seasons out of them, use silicone sealant instead of glue as adhesive!
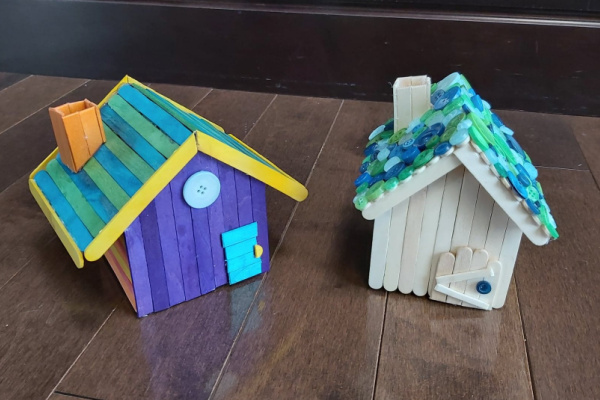
You can choose to make these cute craft stick fairy houses from plain wood popsicle sticks, like I did in this tutorial… or you can go for colored popsicle sticks like the one my kiddos made!
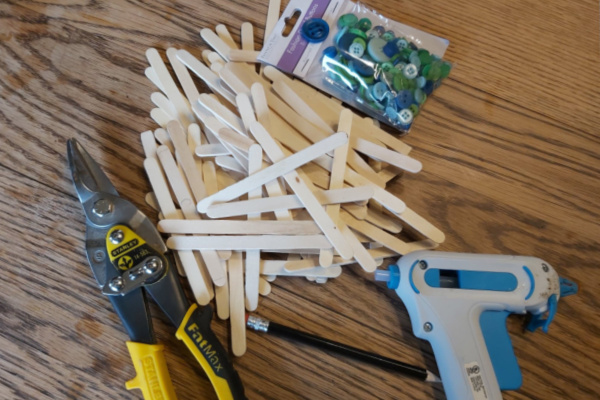
What do you need to make a popsicle stick fairy house?
NOT MUCH lol.
- Popsicle sticks
- a wire cutter / snips of some sort
- a pencil
- hot glue gun (or wood glue etc)
- embellishments of your choice (we used buttons)
You can get everything you need from the dollar store – this is one of my favorite dollar store fairy garden ideas!
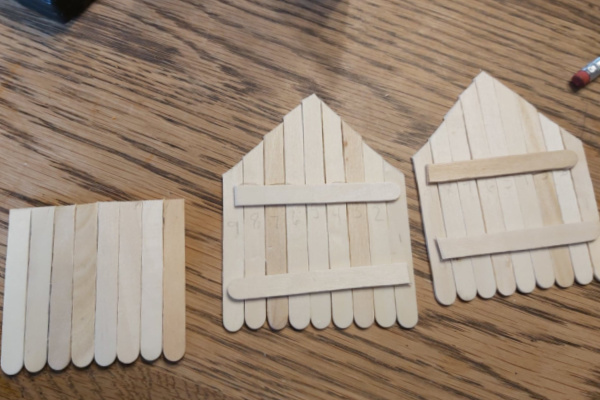
First, lay out your popsicle stick fairy house walls + roof
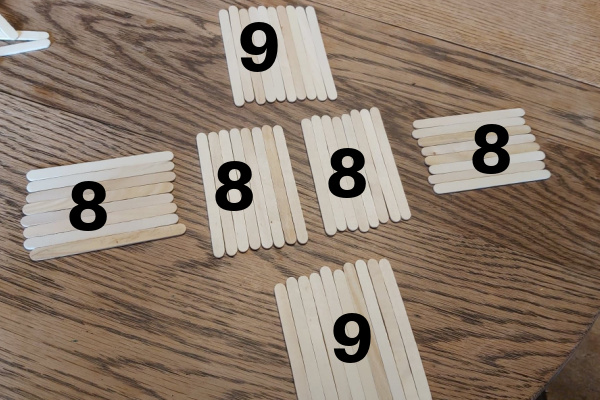
I wanted to make sure I had enough sticks, so I laid out my roof and walls before starting. (I know in the picture here it shows 10 in the image for the front and back walls, but only USED 9. I am often having to tweak and change things as I go, and I didn’t remember to take another picture.)
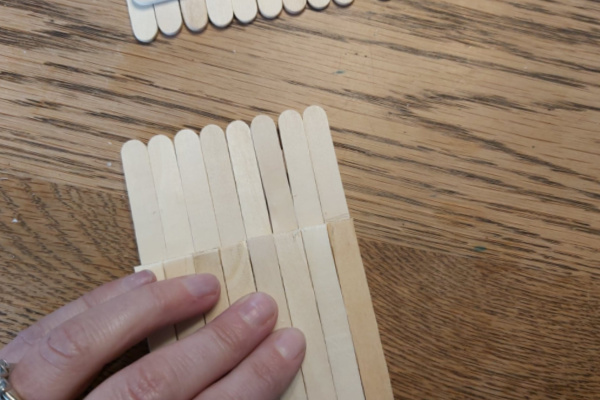
Start fixing the sticks together
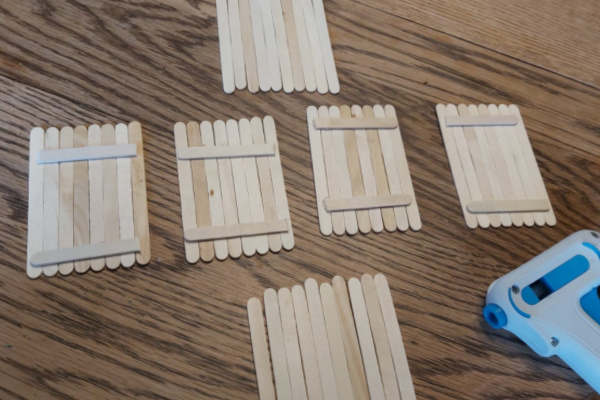
I wanted SIMPLE so instead of gluing each stick to the next, I fixed them together with trimmed sticks laid across them. If you do this – rather than gluing each stick together – remember to keep the ends of the sticks as level as humanly possibly while fixing your trimmed sticks in place, and push the sticks together while the glue dries. (so there aren’t huge gaps in your walls).
(Let’s differentiate between the 2 set of walls by calling them 9 stick walls and 8 stick walls.)
BEFORE YOU START THIS – you might want to read ahead and see how I ended up trimming the two 8 stick side walls. YOU may find it easier to trim BEFORE gluing, but for me this was simple.
Glue your roof together
Take the two roof pieces (8 sticks each), and glue them together at about 90 degrees.

Trace your roof angle onto your 9 stick walls
Lay your roof on top of one of your 9 stick walls, and trace the angle.
This part can be a tiny bit tricky because you have to keep the bottom of your wall level while you draw your angle on. You could fix the sticks with tape for this part.
You won’t want them glued together yet because it is easier to cut them AND easier to transfer the line to another stick (to create the opposing wall) if they aren’t stuck together.
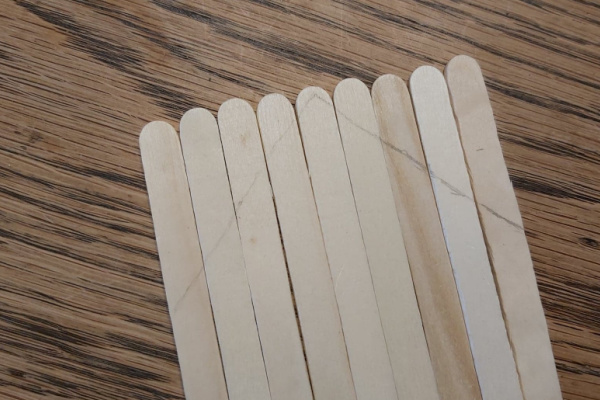
Transfer the lines to your OTHER 9 stick wall. You want to create two basically identical walls.
Cut + glue your 9 stick walls
Once you have your 9 stick walls cut into their angles, glue trimmed sticks across them to hold them together.
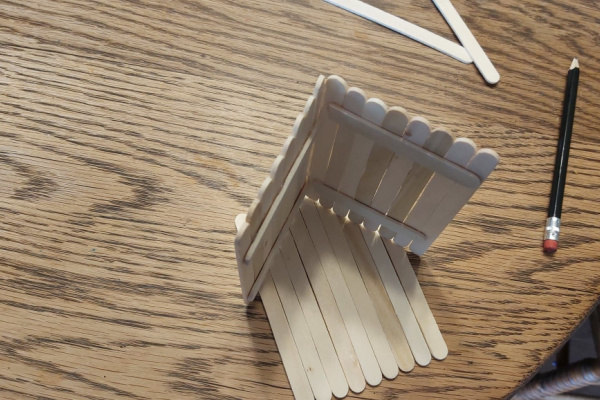
Glue all the walls + roof together
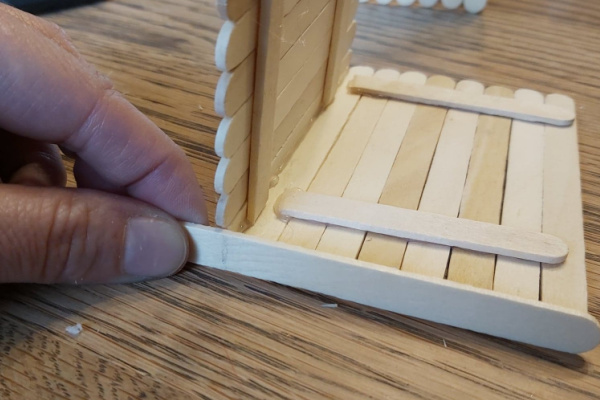
Get your 8 stick walls –
Trim them to the height of your shortest popsicle stick in your 9 stick wall. The outside piece.
I traced the height of one cut wall onto the second –
Glue your newly-shortened 8 stick walls to your 9 stick wall.
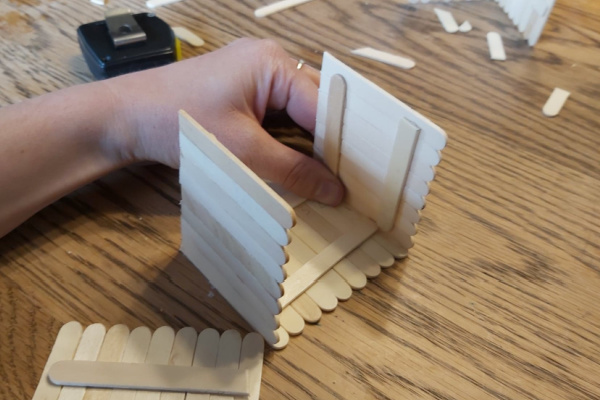
Glue the opposing 9 stick wall on –
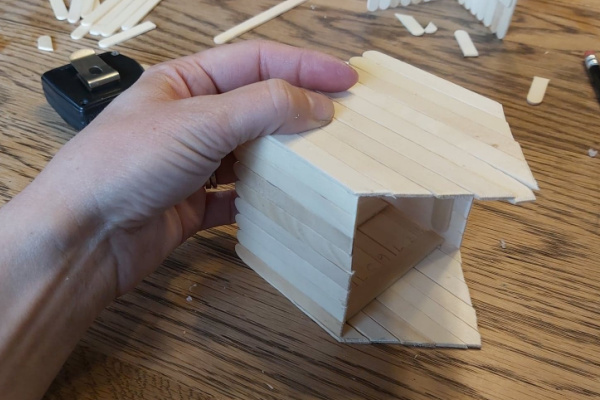
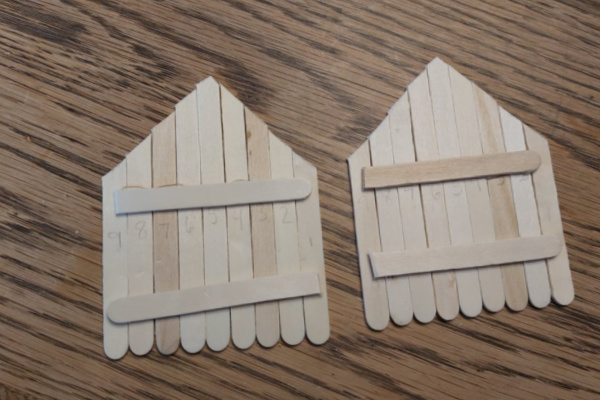
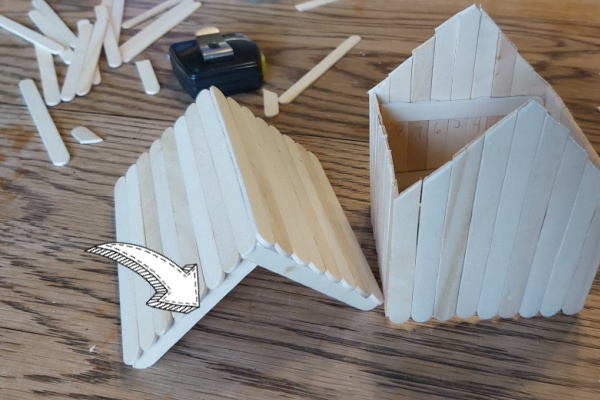
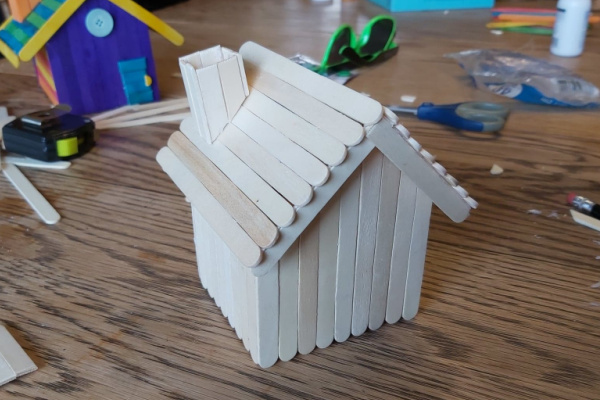
Finish + attach the roof of the popsicle stick fairy house
Here I set the roof on top of the building and realized (of course) that my haphazard sort-of-eye-ball measuring and cutting had left a gappy finish along the top of the house, so I needed to cover that with some sort of facia.
I marked and cut 4 popsicle sticks to the length of the roof.
(I just transferred the lines from one stick to another.)
I forgot to take a picture of gluing it on, but this is what it should look like once you have it glued in place!
Put a GOOD amount of glue along the tops of your angled 9 stick walls, and set your roof on – as centered as you can.
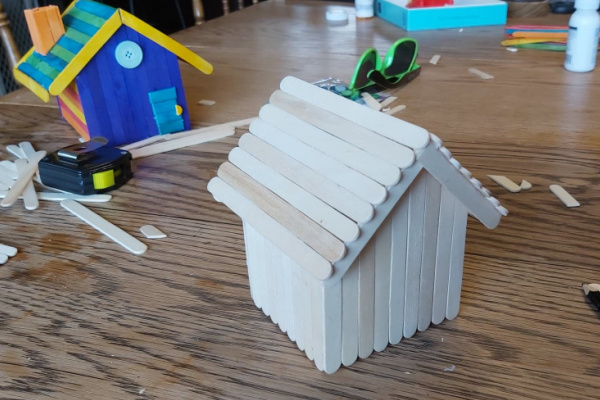
YAY! It LOOKS like a real little house now…
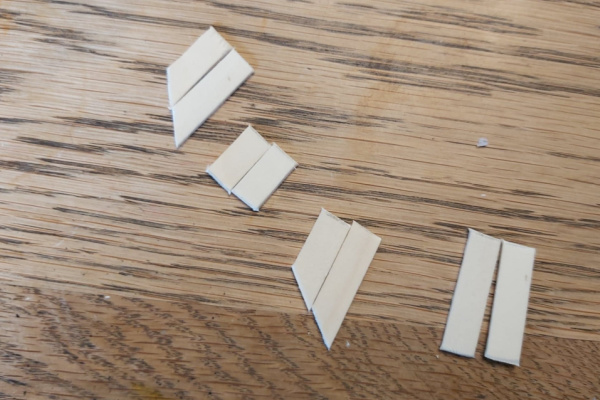
I had a bunch of cut off ends hanging around on the table (from the cut 9 stick walls) and I figured it should be pretty easy to make a little chimney.
Make + attach a chimney
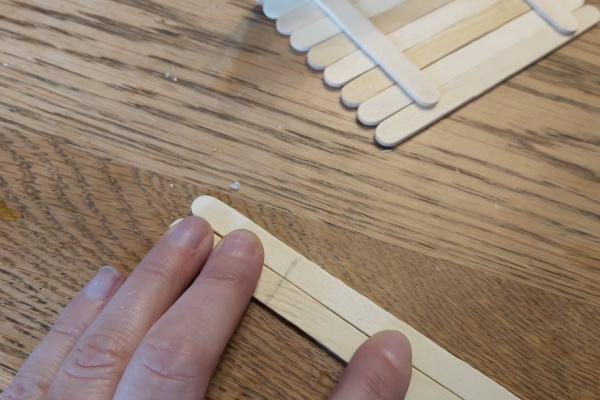
Grab 4 of your longer off-cuts, and line up their cut ends – like in the image below.
Mark straight lines at an equal height across the sets. (That SOUNDS so complicated, but I hope the picture will make it more clear).

These are the two sides of your chimney – now you just need the from and back.
From two more off-cuts, create two pieces equal to the length of the LONGEST side of the long piece, and two pieces equal to the SHORTEST side of the short piece.
(Again, sounds complicated, hopefully the picture will help!)
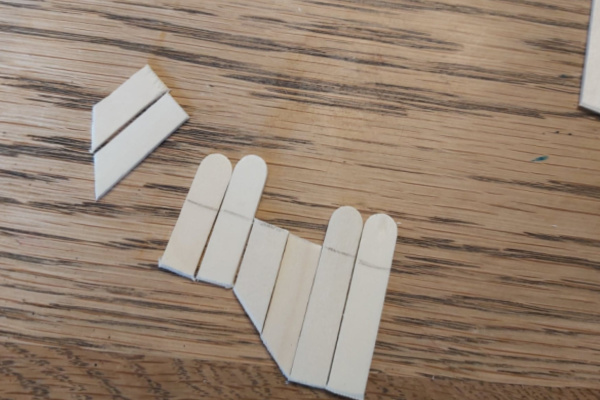
Once you have them all trimmed it should look like the image below!
Glue each of these pieces together in their sets, and then glue each of the sets together as box.
And stick that little box on the roof!
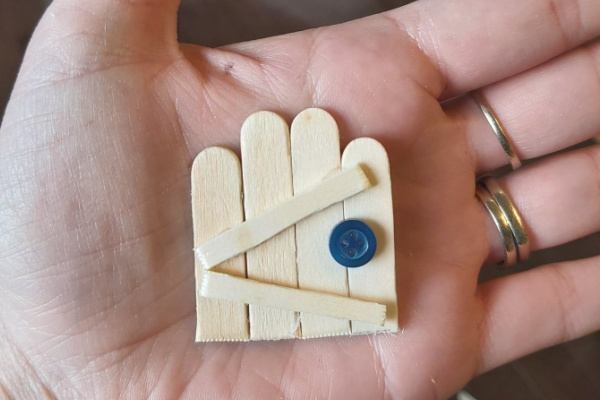
Make + attach a door
To create a tiny door I cut 4more off-cuts and glued them together, with a button door knob.
I generally like the door to really stand out – sometimes I even make polymer clay fairy doors – but since I was committed to keep this popsicle stick fairy house as BASIC as possible, the simple door seemed appropriate lol.
AGGHHHH CUTENESS OVERLOAD!
Buuuuuut… I felt like it was missing something.
Fairies wouldn’t stop here and leave their homes this plain, I’m sure.
It needed something on the ROOF, something … fun.
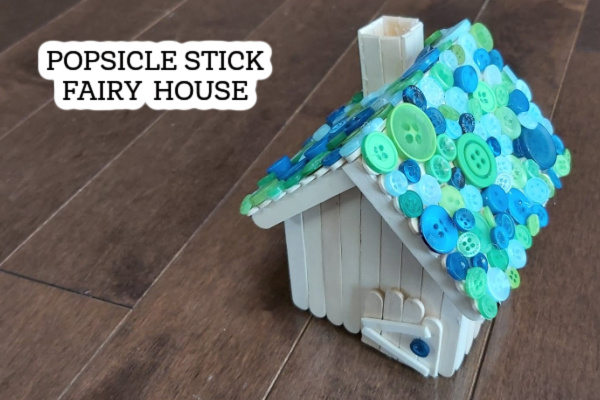
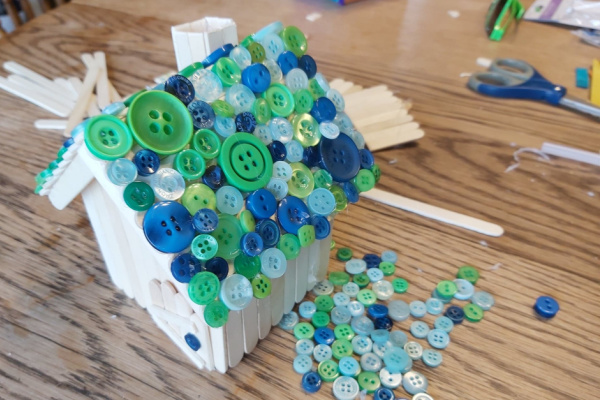
I had this package of buttons from the dollarstore, and they were PERFECT fairy house roof material.
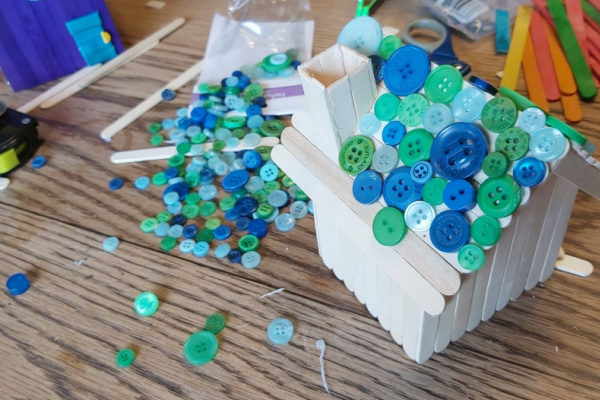
Once I got over the idea that all the buttons had to lay flat it was WAY easier haha.
If a popsicle stick fairy house isn’t quite what you’re looking for, check out my other DIY fairy house ideas!
If you MAKE a popsicle stick fairy house, I’d love to see a picture!
This looks like a fantastic project, Thank youxxx
It was so fun – a perfect fairy house to make with your kids!
I love your bird house!!!! I want to make one now!!
I love your little house and I plan to make one by your patten. Thank you
I’d love to see a picture of any popsicle stick houses you make!
Would wood glue work as well as a glue gun? We are thinking about doing this in school.
I honestly think long term it would work BETTER if you plan to leave the popsicle stick houses outside. (I have had problems with hot glue melting in the sun LOL). You have to be patient tho, with wood glue and allow it to dry between building the individual walls and putting the whole thing together. so many make it a two or three day project for a class?
I am about to fix a fairy Garden in a large terracotta pot. This should be the right size for it. This will be my first attempt to make a fairy Garden.
I’d love to see pictures of your fairy house!