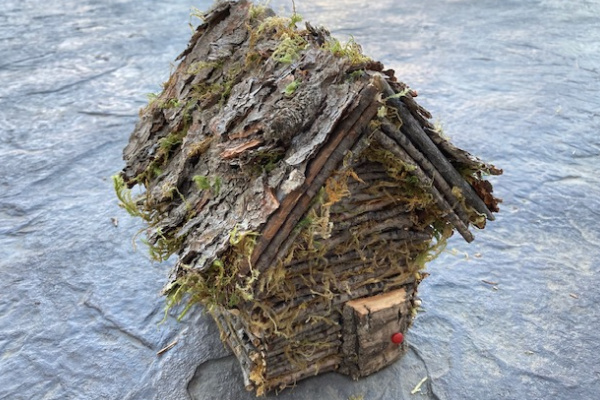
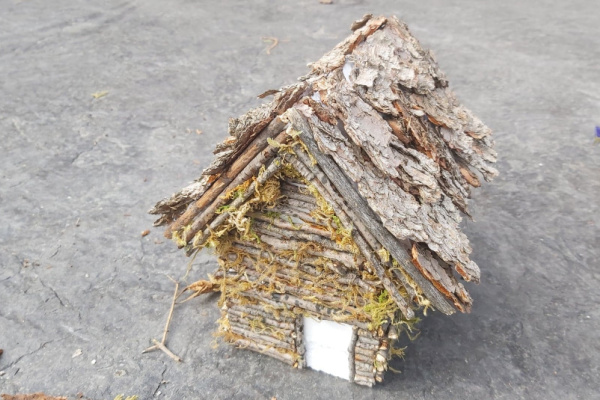
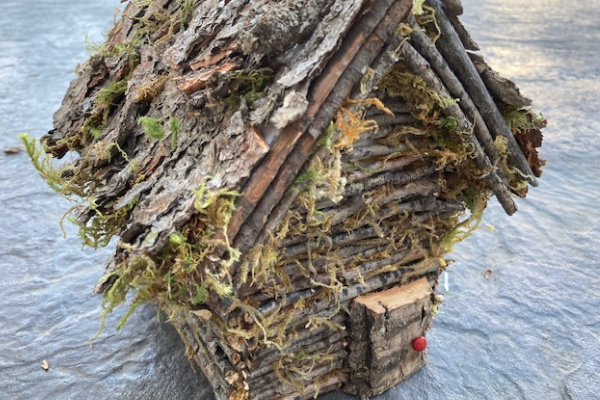
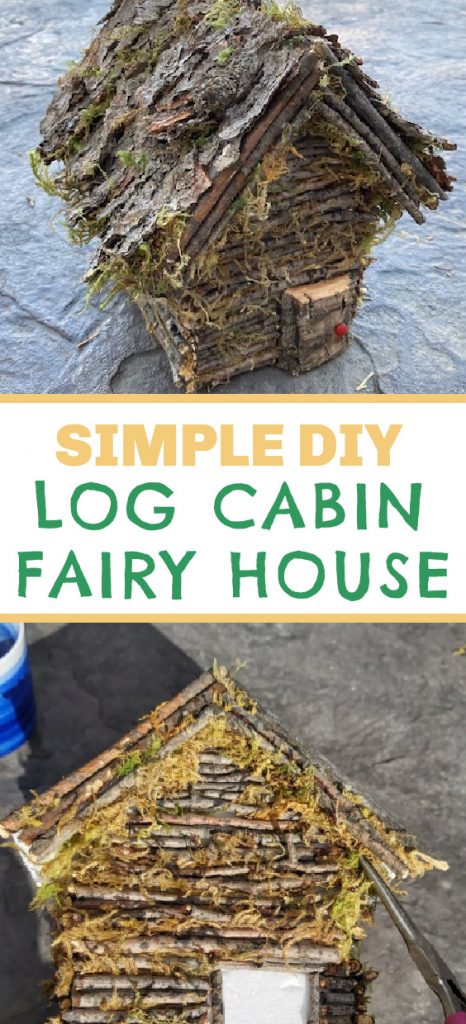
Log-cabin Style DIY Twig Fairy House
You can make fairy houses SO many ways, but my favorite are the fairy houses that look like like the fairies collected all the materials and made them from scratch! If you’re wondering how to make a fairy house out of twigs, you will LOVE this little log-cabin style twig fairy house!
Check out our 10 FAVOURITE PLACES for finding the CHEAPEST fairy garden supplies!
I also like fairy houses that have some longevity to them.
Where I live, the weather can be REALLY hard on anything delicate! We have hail, crazy winds, and extreme temperatures. The first fairy house I ever made melted into a hot-glue and stones puddle on a balmy July day LOL.
I’ve realized over the years that if my fairy houses are going to be outside (even just for the summer months) some consideration HAS to be taken as for how they will stand up against the elements.
(THIS POST MAY CONTAIN AFFILIATE LINKS. YOU CAN READ OUR FULL DISCLOSURE POLICY HERE.)
Of all the fairy houses I’ve ever made, I’d have to say the DIY stone fairy houses have lasted THE BEST, followed closely by the concrete fairy houses… but I REALLY wanted to try and make one that looked like a little log cabin!
I am SO pleased with the way this little diy twig fairy house turned out, but if I was going to do it AGAIN, I would probably build it right onto a concrete block or brick of some kind, rather than Styrofoam. As it is, it will withstand heat / cold or strong wind, but it would probably hold up better in the long run if it was made on a base of concrete.
How to make a fairy house out of twigs:
Gather your materials. Most of the materials I used to make this tiny log cabin style fairy house were collected from around my yard.
If you don’t live in a place where you can find nice uniform twigs (or honestly, if you don’t want to spend the time finding nice uniform twigs) you can actually purchase 100 uniform twigs on Amazon for less than 10$. Wish I’d known THAT before lol.)
To make this twig fairy house I used:
- Styrofoam blocks
- sharp knife
- long nosed pliers
- silicone sealant (the secret to longevity of the houses outdoors!)
- twigs
- dried moss
- bark
- small pebble or seed (for door knob)
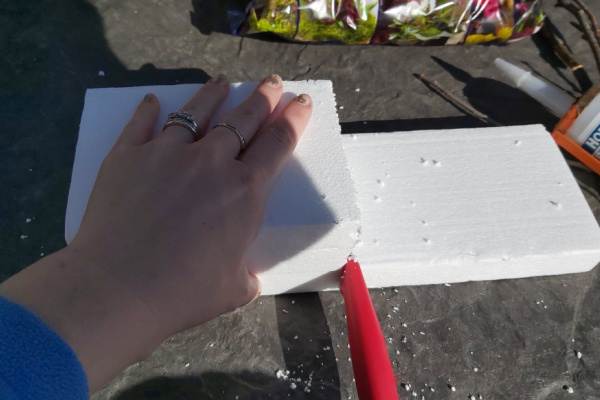
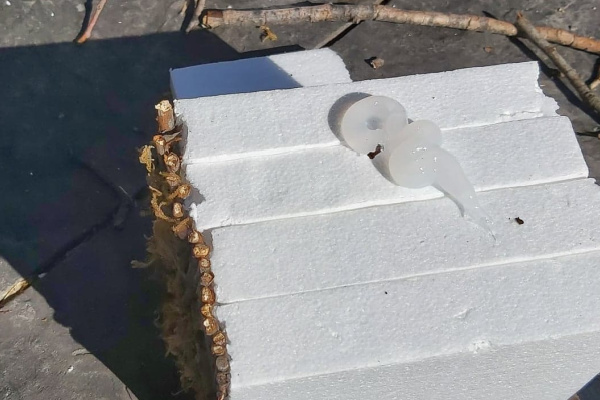
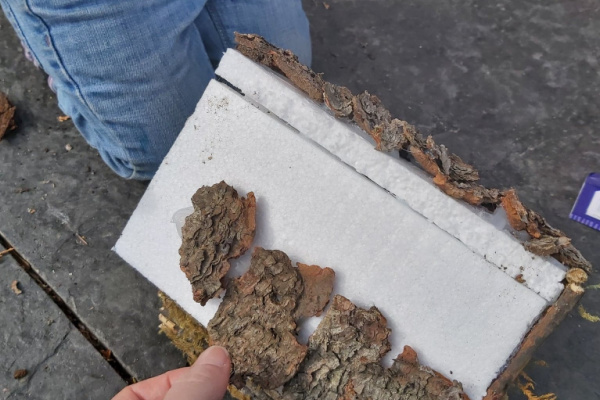
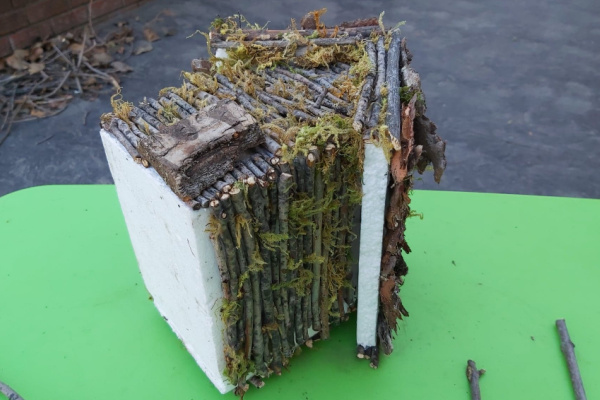
1) Create your base from Styrofoam
To create a base the size I wanted, I cut + stuck together (with silicone sealant) pieces of Styrofoam.
(I had some lying around from my the packaging off my new office furniture. This project MAY have been inspired because my husband, seeing my pull some Styrofoam out of the trash bad said “why are you keeping that, it’s weird like hoarding.”)
Like I mentioned earlier, on further thought, I may have used concrete or even some kind of wooden box as the base for this house. Heck, you could use a birdhouse FILLED with concrete – or rocks – for weight. That way you wouldn’t even have to add a roof shape to it, just build on what already exists!
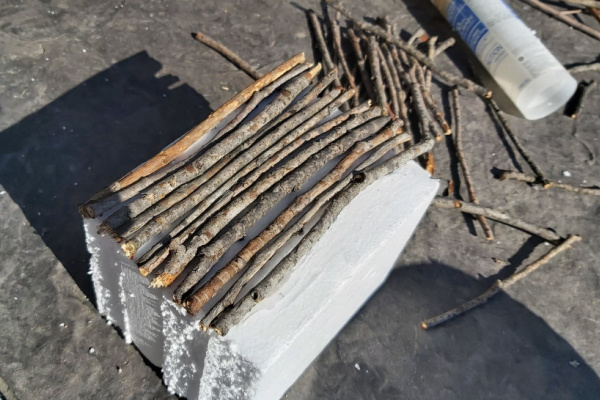
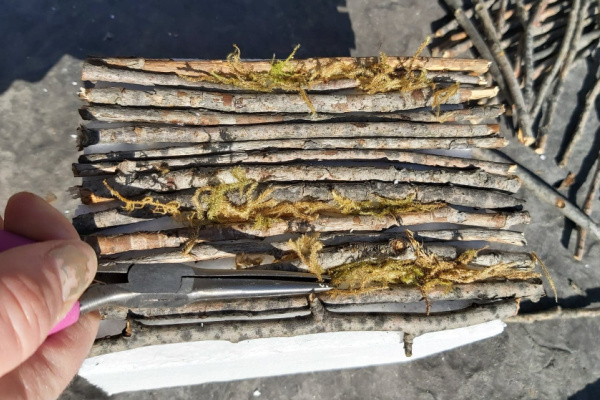
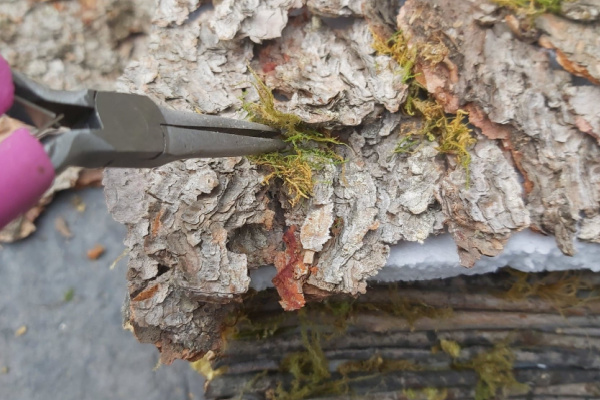
2) Cover your base in twigs – try to get them as close together as possible, but don’t stress about gaps
I use silicone sealant to hold my fairy houses together. It is PERMANENT.
Use A LOT.
Really glob it on, so when you press your sticks / bark / moss / whatever into it, it oozes around everything and stays in place.
It takes time to dry, so this won’t be a super rushed project.
For this house, I did some and then left it for a day and came back, did a little more, left it again etc.
You can see here what I mean when I said don’t stress about gaps – I had a lot of them!
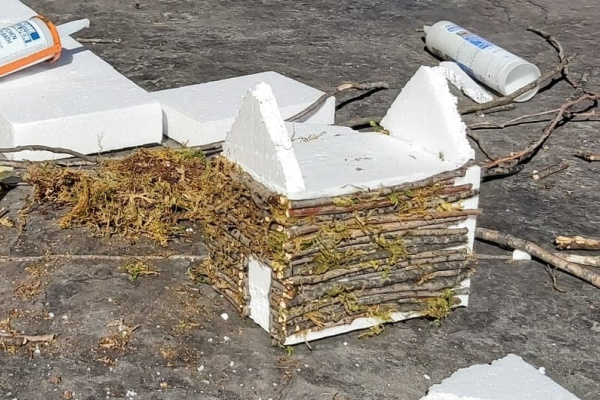
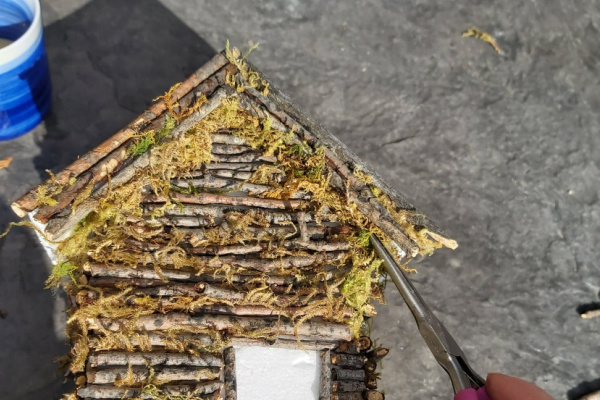
3) Fill your gaps with dried moss as you go
Before you move on to another wall, while the silicone is still very wet, press some dried moss into the worst gaps. (You should have a lot of silicone available to hold the moss if you have used enough silicone sealant!)
Don’t worry about getting it in EVERY TINY GAP – you can always add more with superglue later if you have to.
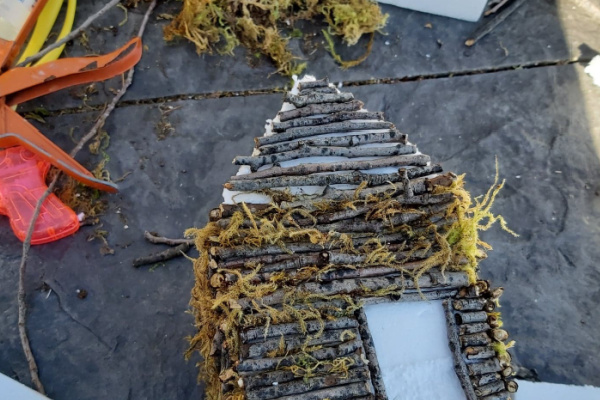
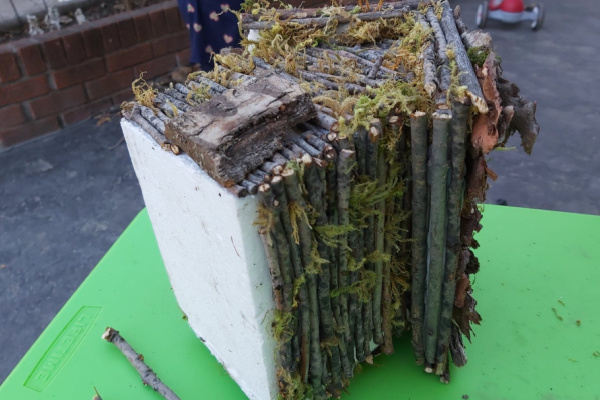
4) Add the roof structure
I wasn’t sure what I was going to do for the door yet, so did build a door in as I was going.
I also wasn’t sure what I was going to do for the roof… building this fairy house out of twigs was sort of a “figure it out as you go” thing.
In the end, I just built the roof form out of more Styrofoam and decided not to add any chimneys or anything extra to this twig fairy house.
I always say I’m going to take better pictures of my projects, but then the time comes when I’m actually doing the project and one hand is covered in silicone and the other hand is fending off children who are throwing bring pink water guns at me and in the end I’m just happy I got ANY old crappy phone pictures of my twig fairy house being created lol.
AGGGHH~ I think this was the point when I fell in love with it and knew it would be a winner hahaha. I love how realistic it looked as soon as it got (even a Styrofoam) roof on:
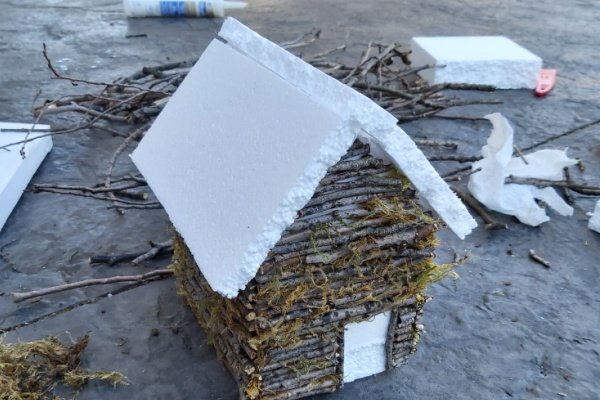
I had NO idea what I would cover the roof in – what to use for the roof material on a fairy house is a pretty important question!
In my head I was going to cover it with more twigs… this was going to be a 100% twig fairy house lol. But that would have looked sort of silly and I felt like it needed a distinction between roof + wall.
I actually left it sitting for DAYS thinking about what I could cover the roof in, and even ordered some copper plating from amazon… but once I saw it I knew it just wasn’t right for this house.
In the mean time, I decided to do the “facia” with more twigs and moss.
The moss seriously covers a heap of Styrofoam sins!
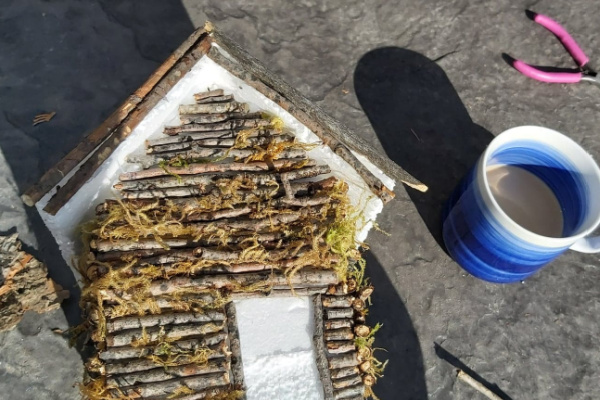
5) Cover the roof in your chosen roofing material:
Finally, I asked my 4 year old what I should make the roof out of, and he said tree bark. (My kids love to build fairy gardens too!)
So, bark it was!
Breaking bark up into smaller pieces really helped it go on more “shingle-y”, and breaking off any very curly pieces helped also.
There were a lot of really bad white spaces – to fill most of the big ones I stuck tiny tiny pieces of bark into the silicone, and then of course, finished with more moss.
I thought it was going to need some kind of ridge cap, but honestly, as long as I was careful to butt the top pieces as close together as possible, ridge cap isn’t even necessary! YAY!
Because of some seriously questionable looking bug larva I found in the last few pieces of bark I was placing, this house isn’t actually allowed inside my house anymore hahaha.
I was sort of grossed out, but I’m MAKING it as an outdoor fairy garden house, so I decided not to let it bother me.
Perhaps if you want to create a log cabin style fairy house with a bark roof for inside your home, consider ways to de-bug the bark. I dunno – perhaps place it in a plastic bag and spray with some raid or something? Microwave it? (That’s a joke. Please don’t start a fire in your house. I’m just saying, watch out for some bugs.)
6) Attach a door to your twig fairy house
Because we had gone with a bark roof, I felt pretty committed to the idea of a 100% natural material house. I had originally planned to make a polymer clay door to fit inside the door jam, but that isn’t natural so I scoured the edges of my yard looking for ANYTHING with a mostly flat back to make the door.
This piece of thick bark was about as flat and even as I was going to get.
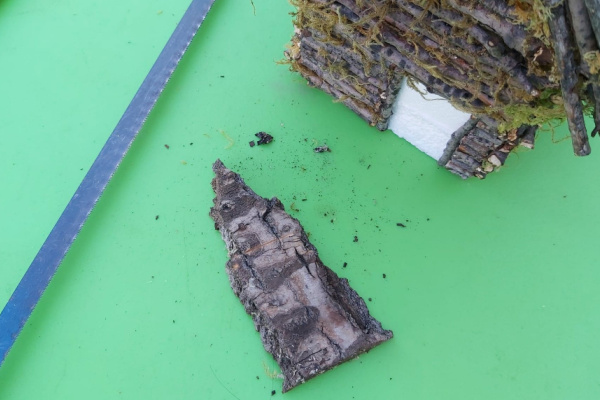
I can always tell when I’m starting to get tired of a work in progress, and it’s the point when I go, “Ok, I’ll just stick this lump of door on overtop of the door space instead of trying to find something that fits INSIDE the door space”.
But whatever – I think it looks great! I like the big heavy natural look. We did cut it down, but I ALMOST wish I had just left it long and pointy!
6) Fill any remaining Styrofoam holes with twigs or moss
The last place that was REALLY glaring was the bottom edge of the roof – so I covered it in more twigs.
Finish off your house by filling any gaps left with moss, and add a door knob!
I really wanted to use a small white pebble, because I thought it would blend in but also stand out – you know what I mean. We ended up using a red seed – it HAD to be natural material at this point, I figured, and I just WAS NOT finding a white pebble the right size…. and I really wanted to finish the twig fairy house. I had a jar full of these cool red seeds I collected in Australia when I was 21, so we stuck one of those on there.
It works.
There are really no rules when it comes to how to make a fairy house out of twigs, but I hope this tutorial gave you some good ideas to get going on your own twig fairy house.
It’s a bit early for putting fairy gardens together here, so this little house is just waiting (outside, bark bugs, you know) for the summer season to fully arrive so we can build a fairy garden it will go perfectly in… I’m thinking farm theme style, maybe with a veggie garden – I already have little polymer clay veggies and mini garden tools made to go with!
I’d love to see your twig fairy house, if you build one, send me a picture!
Hello, this is lovely!
I just fixed a ten house my parents have had for long time wind blew it down .used old bark for roofing .I think it turned out .not done yet
old bark is a fantastic roofing material!
Loved the tutorial. Gave me insight to start on mine. Mine is inside thank you and I will be following you in the future
Nice design, but I don’t care for a house full of foam. Fairies can’t get in. I would pick as much foam out as possible, then dissolve the rest with something like petrol or acetone (dissolves foam). Or, like you said, start with a dollar store wooden birdhouse.
yes – the wooden birdhouses work really well!